Expert mode,
one phase at a time
The manual of expert mode — the phases interface, where you build one network yourself. One model walked through its whole life — build it, feed it, train it, audit it, question it, package it. Each phase states what it has and what it still needs, so you always know where the model stands.
This is the manual of expert mode, not of the Studio’s main path. The main path is the study: you frame the problem and several engines compete on your data (it is told in the Studio tour). Expert mode is the other way of working: you describe one model in a sentence, upload a CSV or start from a template, and the core builds that one network, phase by phase. Nothing in it makes engines compete. To turn it on, press Turn on expert mode on the Studio’s home screen; it stays on until you turn it off. It opens in the phases interface, the Classic interface link in the top bar takes you across whenever you want it, and both talk to the same core. If you need to ask for one by address, /fases and /clasica are the canonical forms, and ?fases and ?clasica work too — they are permanent aliases, not a transition. The screenshots below were taken before the study existed: they show the three doors and the right-hand column; today, above them, there are also the study block and the “Expert mode on” bar.
Every screenshot on this page comes from a real session, driven from the first screen to the last. Nothing here is a mock-up.
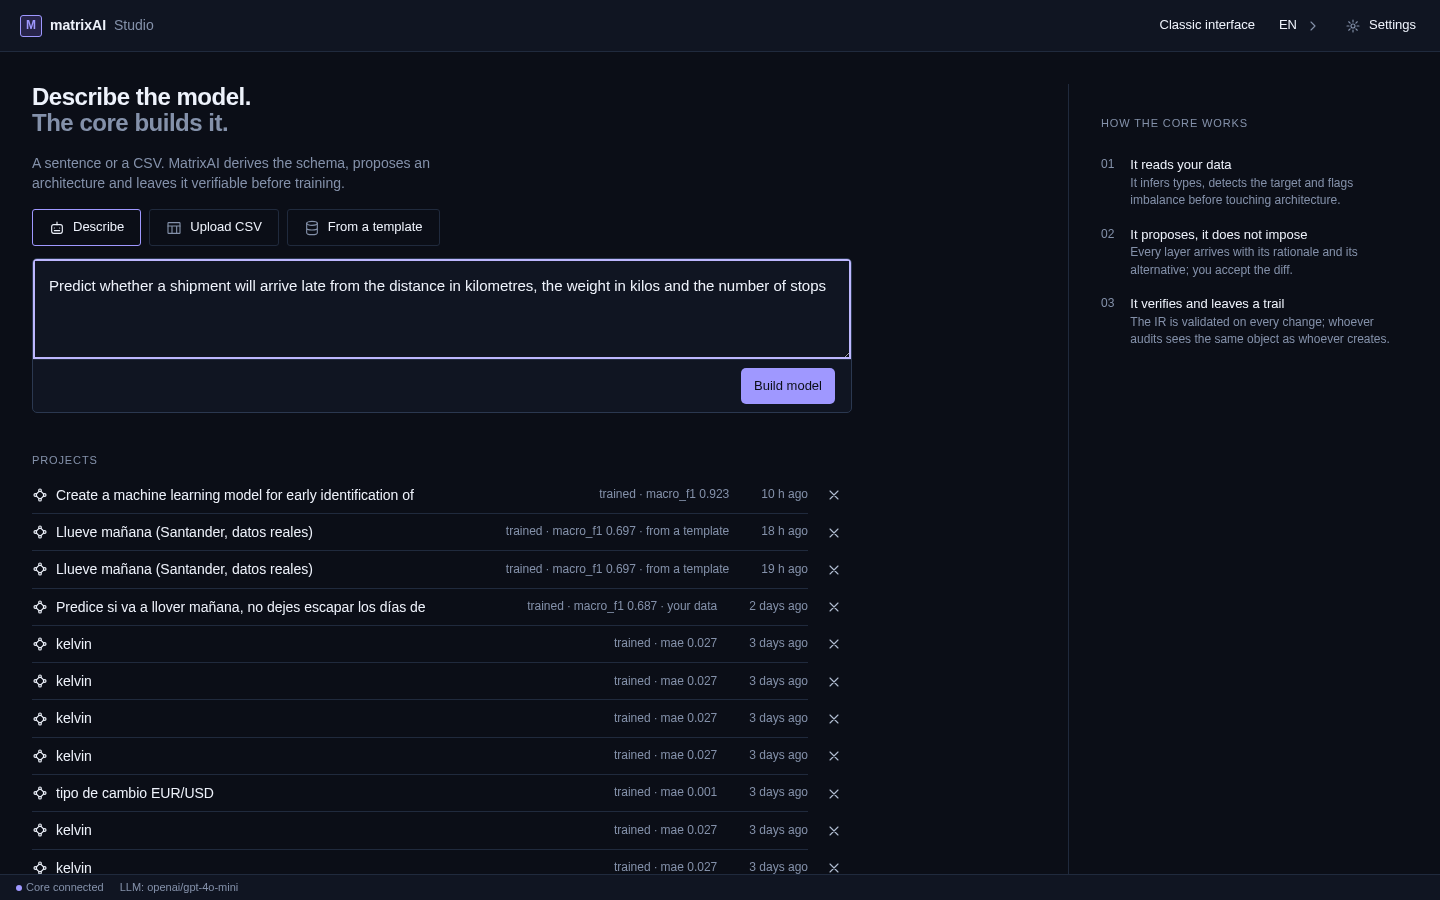
The model being walked through was built from a single sentence — Predict whether a shipment will arrive late from the distance in kilometres, the weight in kilos and the number of stops — and trained on 200 rows that the core generated for it. Generated rows carry no real relationship, so the training numbers you will see are chance level. They are here to show what each phase reports, not to claim a result. Feed it a CSV with a real relationship in it and the screens are the same; only the numbers change.
Three doors, one question
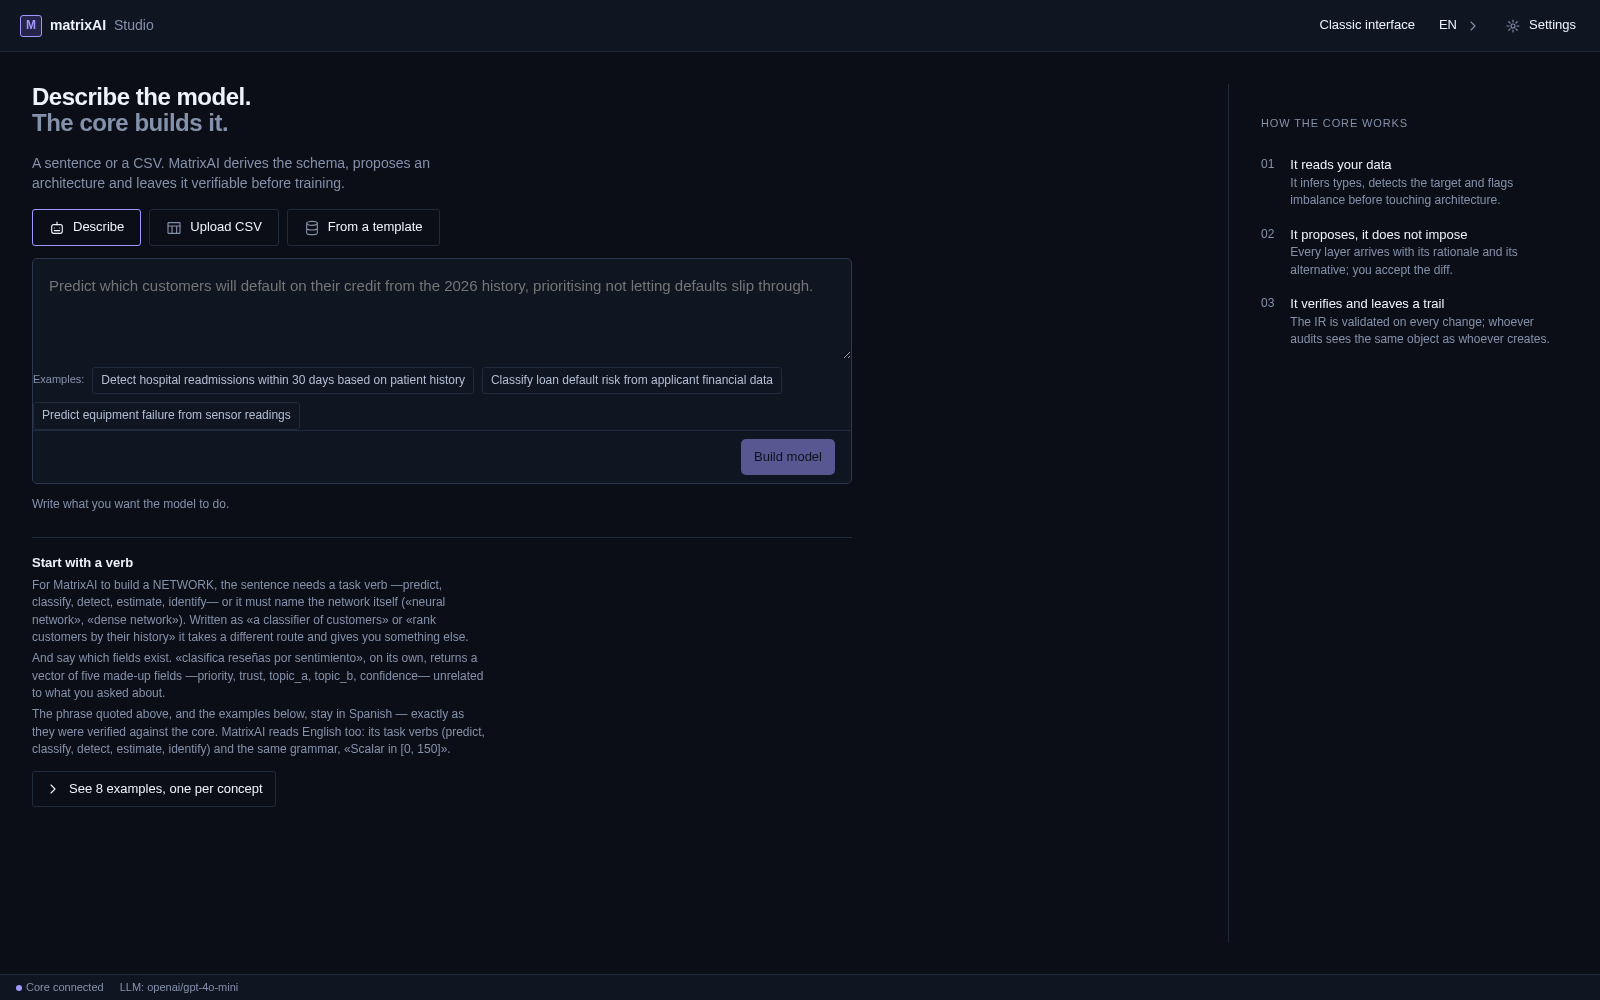
With expert mode on, the first screen asks for one thing: what the model has to do. There are three ways to answer, and the column on the right states up front what the core will do with your answer — read the data and infer types, propose an architecture with its rationale and its alternative, and validate the result on every change so that whoever audits sees the same object as whoever creates.
- Describe — one sentence in plain language. Example prompts sit under the box and fill it in for you if you are stuck.
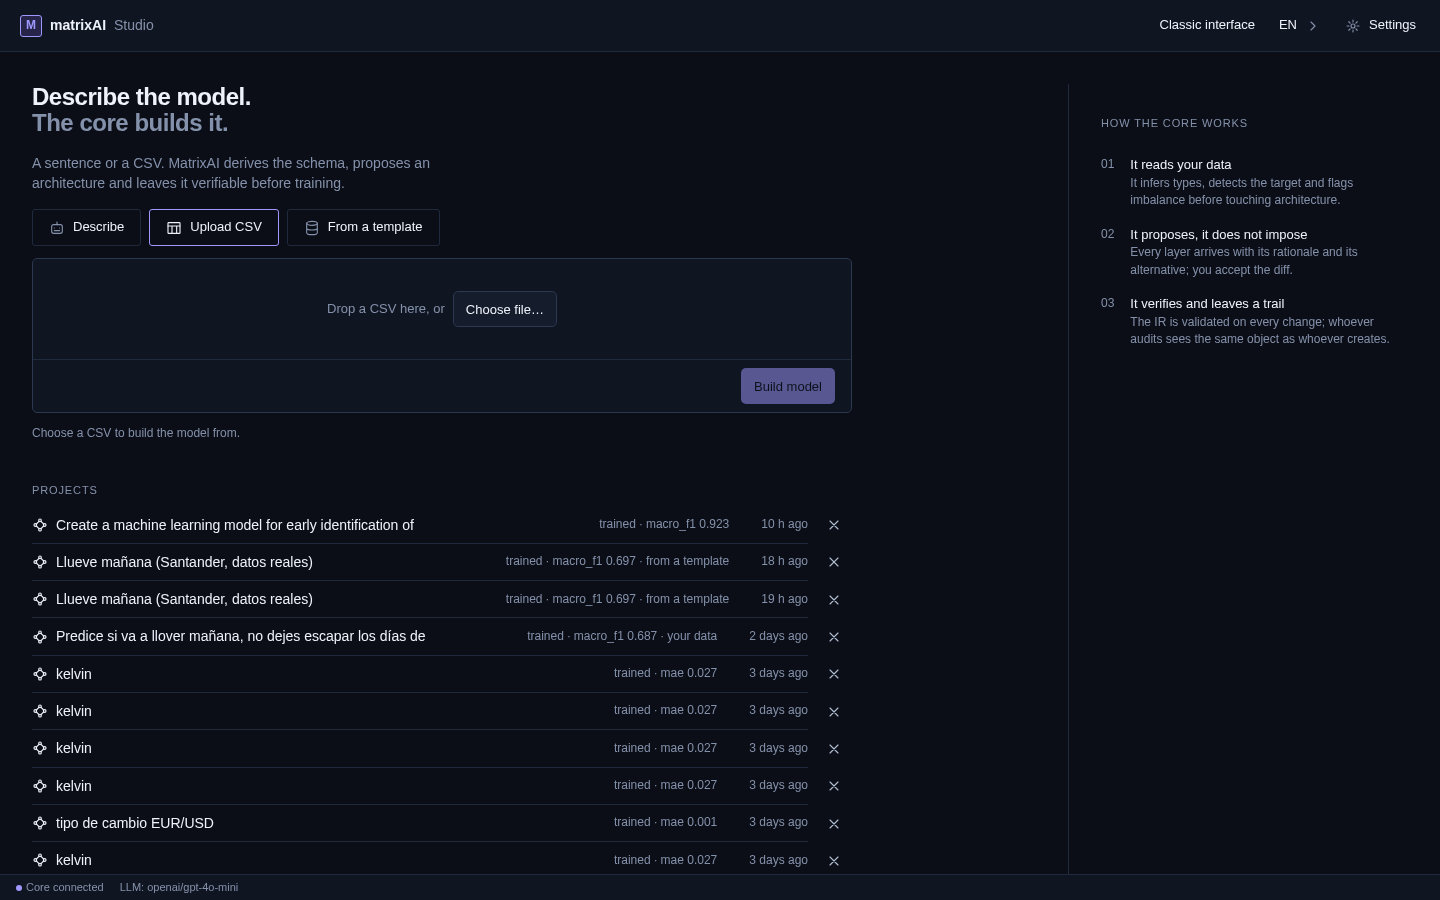
- Upload CSV — drop a file or pick one, and the model is derived from its columns.
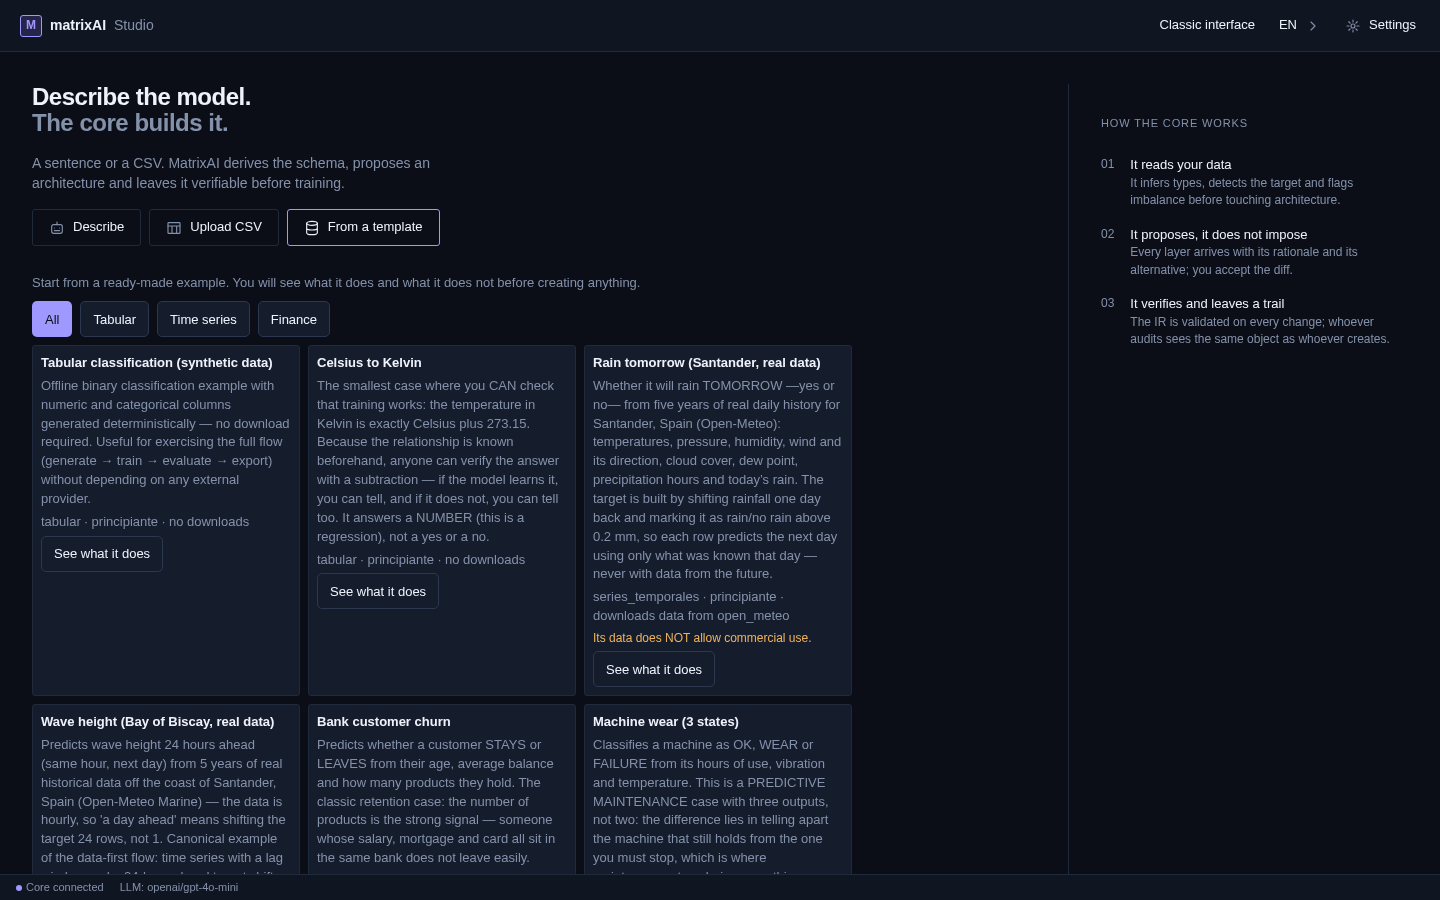
- From a template — a catalogue of ready-made examples, filterable by category.
Under the three doors, Projects lists everything already built: its state and the metric that matters for its kind of model, where its data came from, and how long ago it was touched. The × on the right removes one.
The catalogue states its own promise at the top: Start from a ready-made example. You will see what it does and what it does not before creating anything. Each card carries what the example predicts, its category and difficulty, whether it downloads anything from the internet, and a See what it does button. The Santander rain example carries a red line of its own — its data does not allow commercial use — on the card, not buried in a licence you meet later.
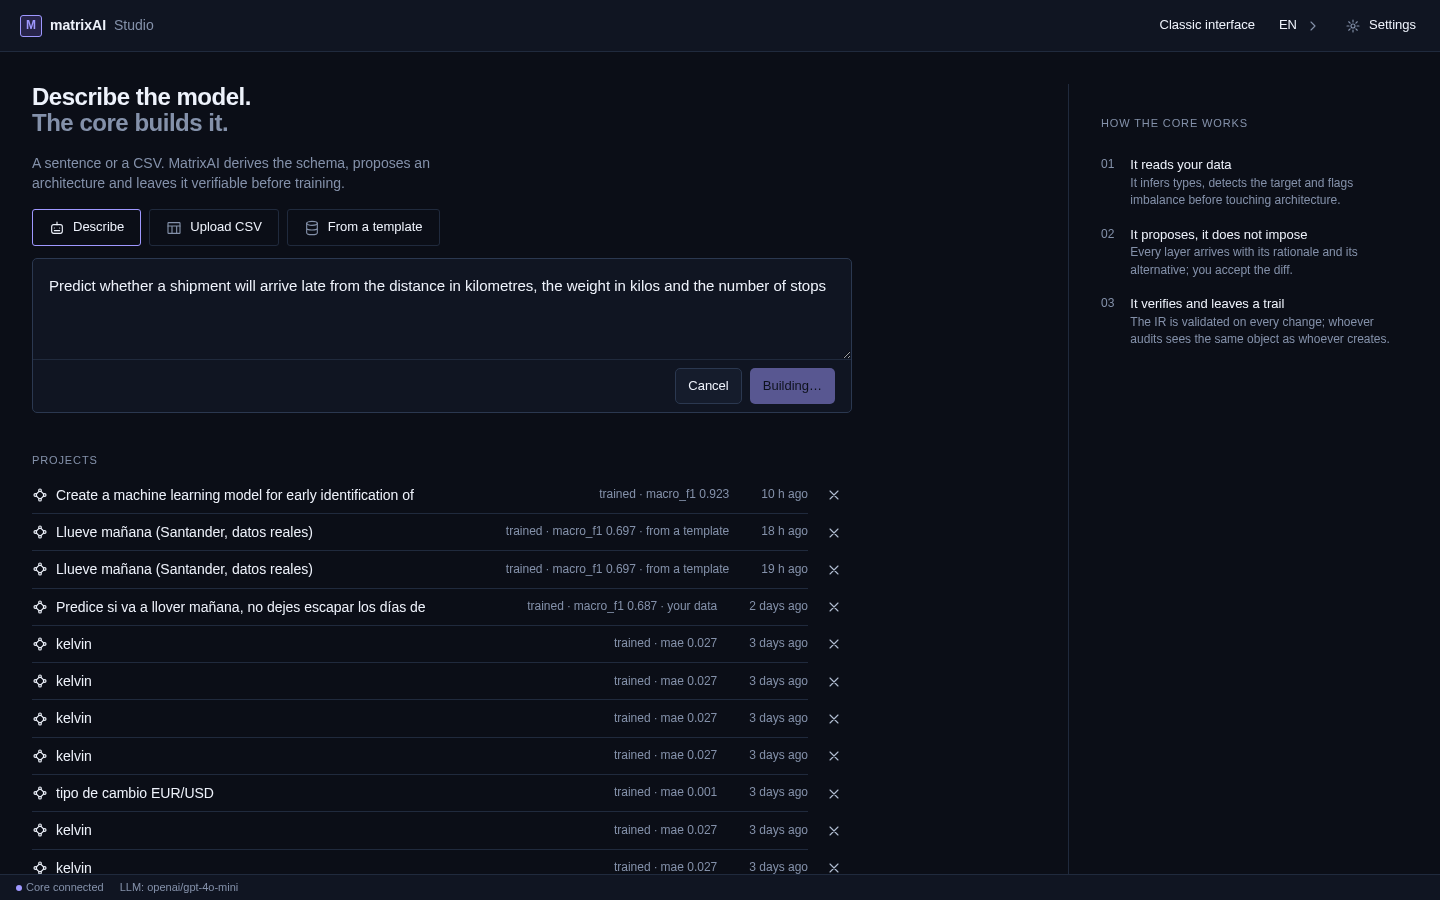
Write it, then let the core build it
Build model stays dim while there is nothing to build. As soon as the box has text it lights up.
While the core works, the button becomes Building… and a Cancel appears beside it. A build you can stop is a build you can afford to try.
The rail is the state of the model
When the build finishes the screen changes shape. The name of the model moves into the top bar next to a WIRED TO THE CORE badge, with Save, a link back to the Classic interface, the language switch and Settings on the right. The status line at the bottom reports three things at once: whether the core is connected, which LLM provider is configured, and whether the IR — the object every check runs against — is valid.
The rail on the left is the model's own state, and it is readable from inside any phase. Each entry carries a one-line summary of itself: Model · 64 → 32 → 1 · 2,369 parameters · 3 warnings, Data · 200 rows, Training · completed, Audit · 6 checks · 1 warning. A phase with nothing to report shows only its number and its name. A tick means done; an exclamation mark means done with something to read. Collapse at the bottom folds the rail away.
What the core built
The first phase holds the architecture the core proposed for your sentence or your columns, and the rail keeps its summary in view from everywhere else: the widths of the layers, the number of trainable parameters, and how many warnings the build raised.
The numbers are checkable, which is the point of printing them. This model takes the three fields the sentence named — distance, weight and number of stops — into a 64 → 32 → 1 dense network: 3×64+64, then 64×32+32, then 32×1+1. That is exactly the 2,369 parameters the rail reports.
Rows, and what the core reads in them
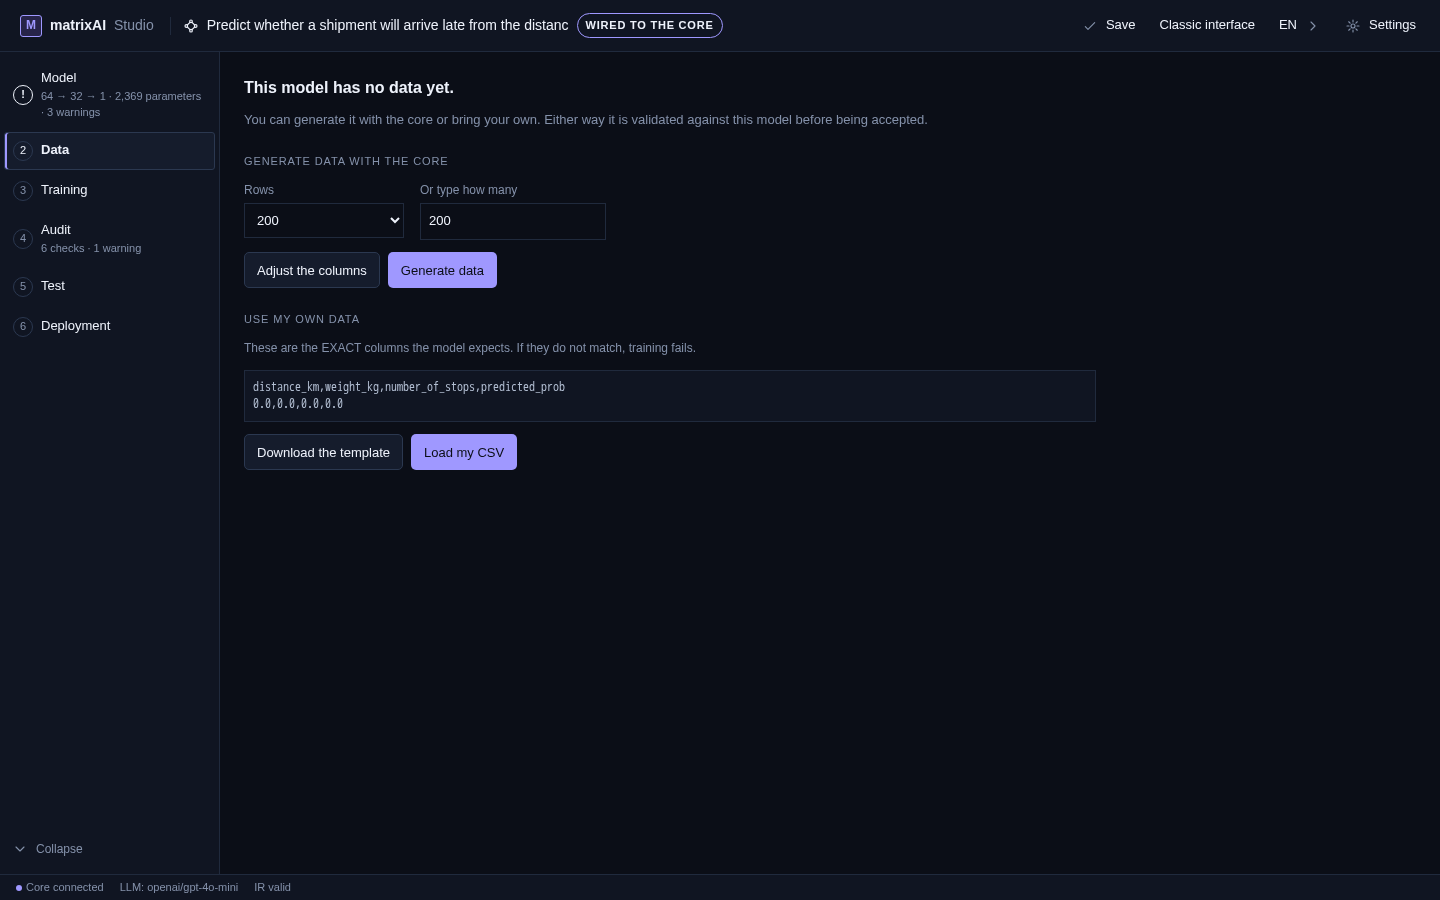
Nothing trains without rows, and the phase says so plainly: This model has no data yet. Two routes out, and both end the same way — whatever arrives is validated against this model before being accepted.
- Generate data with the core — pick a row count from the list or type your own. Adjust the columns sits next to the generate button.
- Use my own data — the panel prints the exact columns the model expects, header plus one example row, and warns that training fails if they do not match. Download the template hands you that header as a file; Load my CSV takes yours.
Once there are rows, the phase turns into a reading of them — and it is careful about which part of that reading is authoritative:
- The file, with its row and column count.
- A preview of the first 8 rows, with the reason it exists written next to it: so you can recognise your file. The schema below is inferred by the backend, which is the one that really reads it. The preview does not pretend to be the source of truth.
- What do you want to predict — the core proposes a target and says why it proposed that one (here: it is the last column in the CSV, and it has few distinct categories, so it is a classification). It also shows the alternative it considered, as a regression, with its own reason — and a dropdown for any other column. It proposes; you decide.
- Schema inferred from your data — every field with its type and its range, all editable, under the line that matters: your correction takes precedence over what the core inferred. A wrong range makes the model learn over a domain that does not exist.
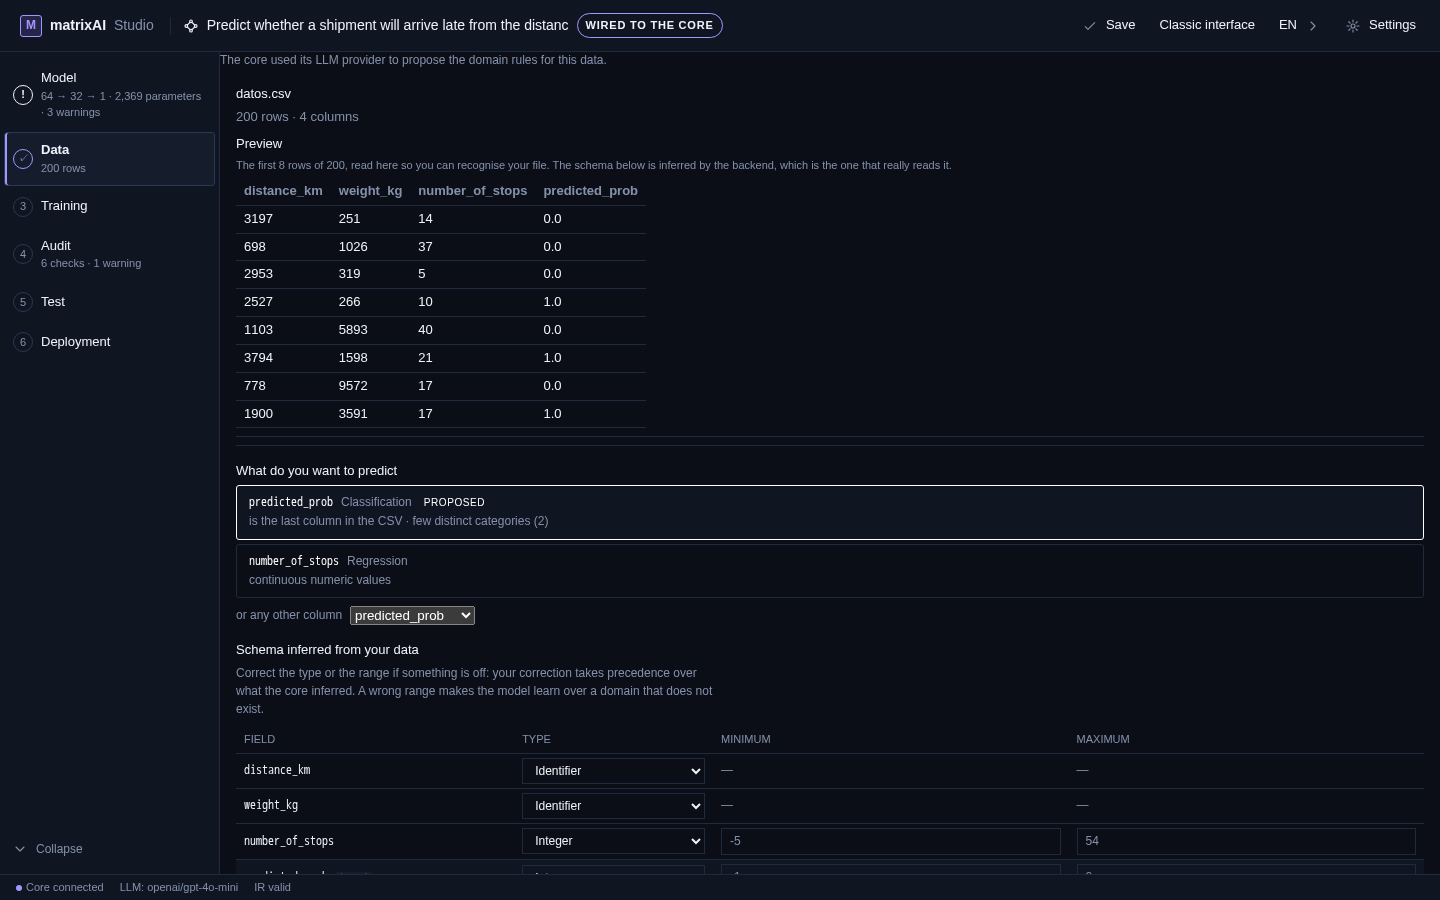
When an LLM provider is configured, the panel declares it rather than letting you assume: the line above the file states that the core used its LLM provider to propose the domain rules for this data.
Train, and read what it declares
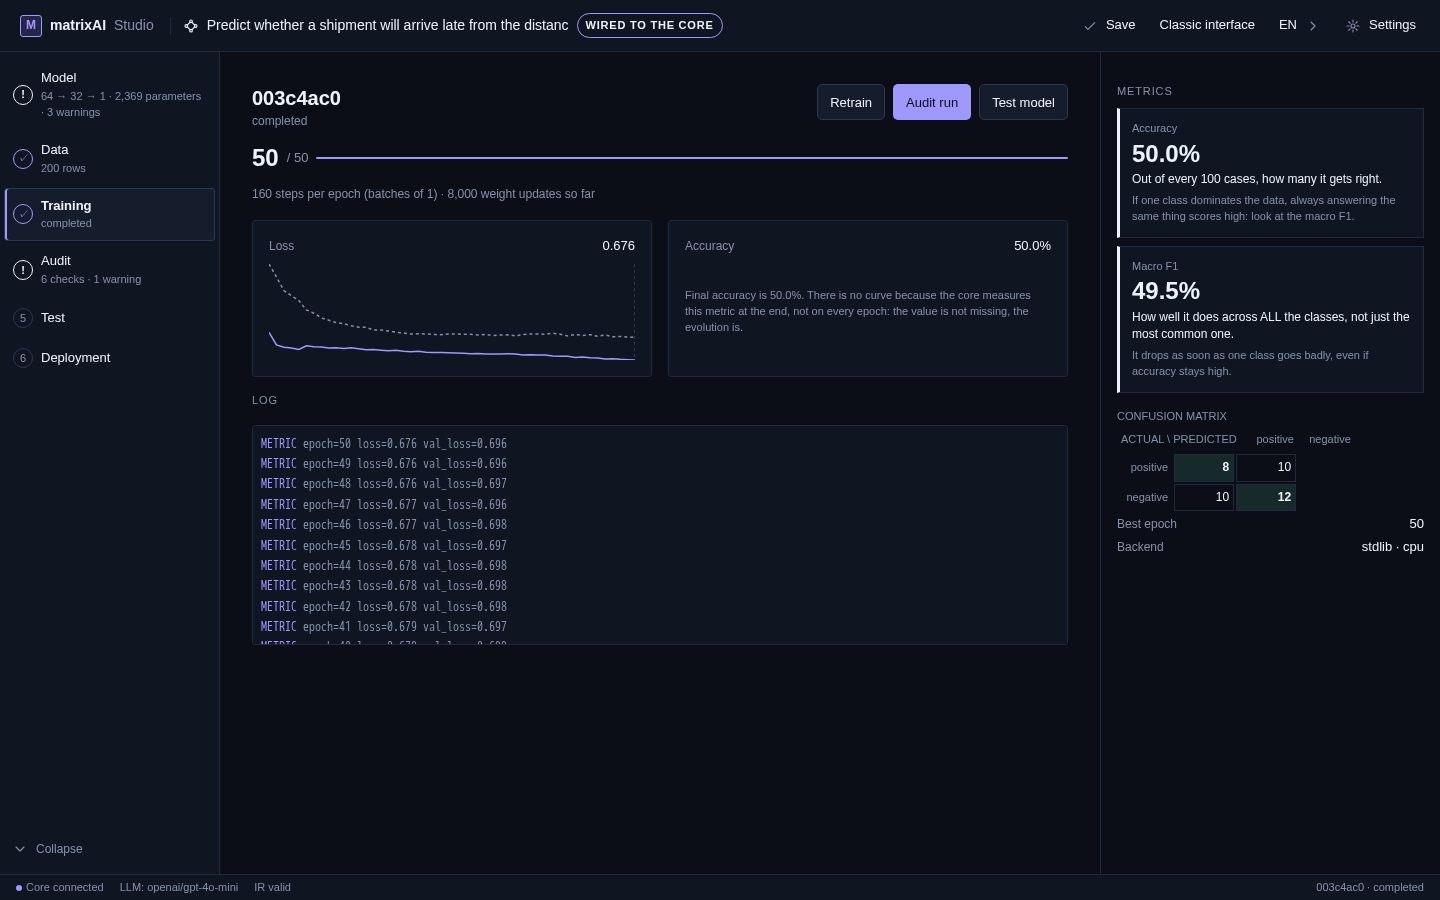
Before you press anything, the phase tells you what pressing it will give you: the current epoch, the loss and accuracy curves, the core log, and the comparison with earlier runs. Then one button.

When the run ends, everything it produced is on one screen:
- The run identifier and its state, with Retrain, Audit run and Test model next to it — the three things you would reasonably do next.
- The epoch counter, and under it the real cost of those epochs: steps per epoch, batch size, and how many weight updates have happened so far.
- The loss curve, training and validation together, with the final value.
- The accuracy panel — and an explanation of why there is no curve beside it: the core measures this metric at the end, not on every epoch: the value is not missing, the evolution is. A panel that names what it does not have beats one that leaves a blank.
- The log: the core's own
METRIClines, epoch by epoch, exactly as it wrote them. - The metrics column, where each number arrives with a plain sentence for what it means and a second one for how it can mislead you. Accuracy: if one class dominates the data, always answering the same thing scores high: look at the macro F1. Macro F1: it drops as soon as one class goes badly, even if accuracy stays high.
- The confusion matrix, actual against predicted, so you can see which way the mistakes go and not only how many there are.
- The best epoch, and which backend ran the training and on what — here
stdlib · cpu.
The checks, and the parts nobody checks
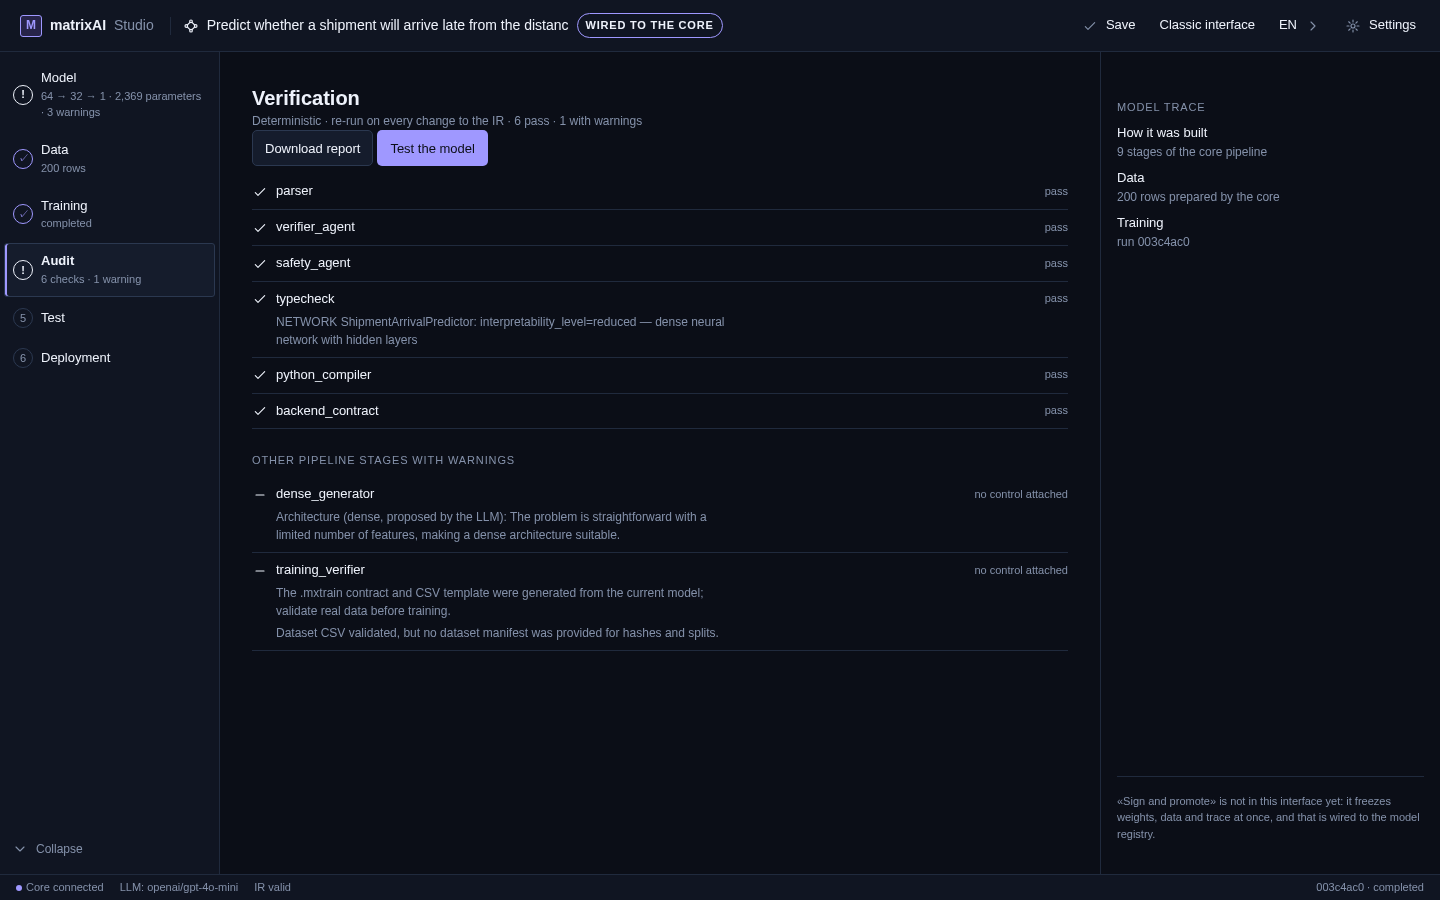
Audit is not a summary of the training. It is the set of checks the core runs against the model itself, and the header states the rules it plays by: deterministic, and re-run on every change to the IR — so the verdict cannot go stale behind your back.
Six checks are listed by name with their result: parser, verifier_agent, safety_agent, typecheck, python_compiler and backend_contract. Where a check has something to add it adds it under its own name — the type check prints what it typed: the network, its interpretability level marked reduced, and the reason on the same line, that it is a dense neural network with hidden layers.
Below them, kept deliberately separate, sit the pipeline stages with no control attached: the parts of the build that nothing can pass or fail, listed with whatever they did report. In this run, the generator's reason for choosing a dense architecture, and the training verifier's caveat that the CSV was validated but no dataset manifest was provided for hashes and splits. They are printed with the reason they carry no verdict, instead of disappearing under a green tick.
- Download report takes the whole verification out as a file.
- Test the model jumps straight to the next phase.
- On the right, the model trace: how it was built, stage by stage; the data it was prepared with; and the training run it belongs to.
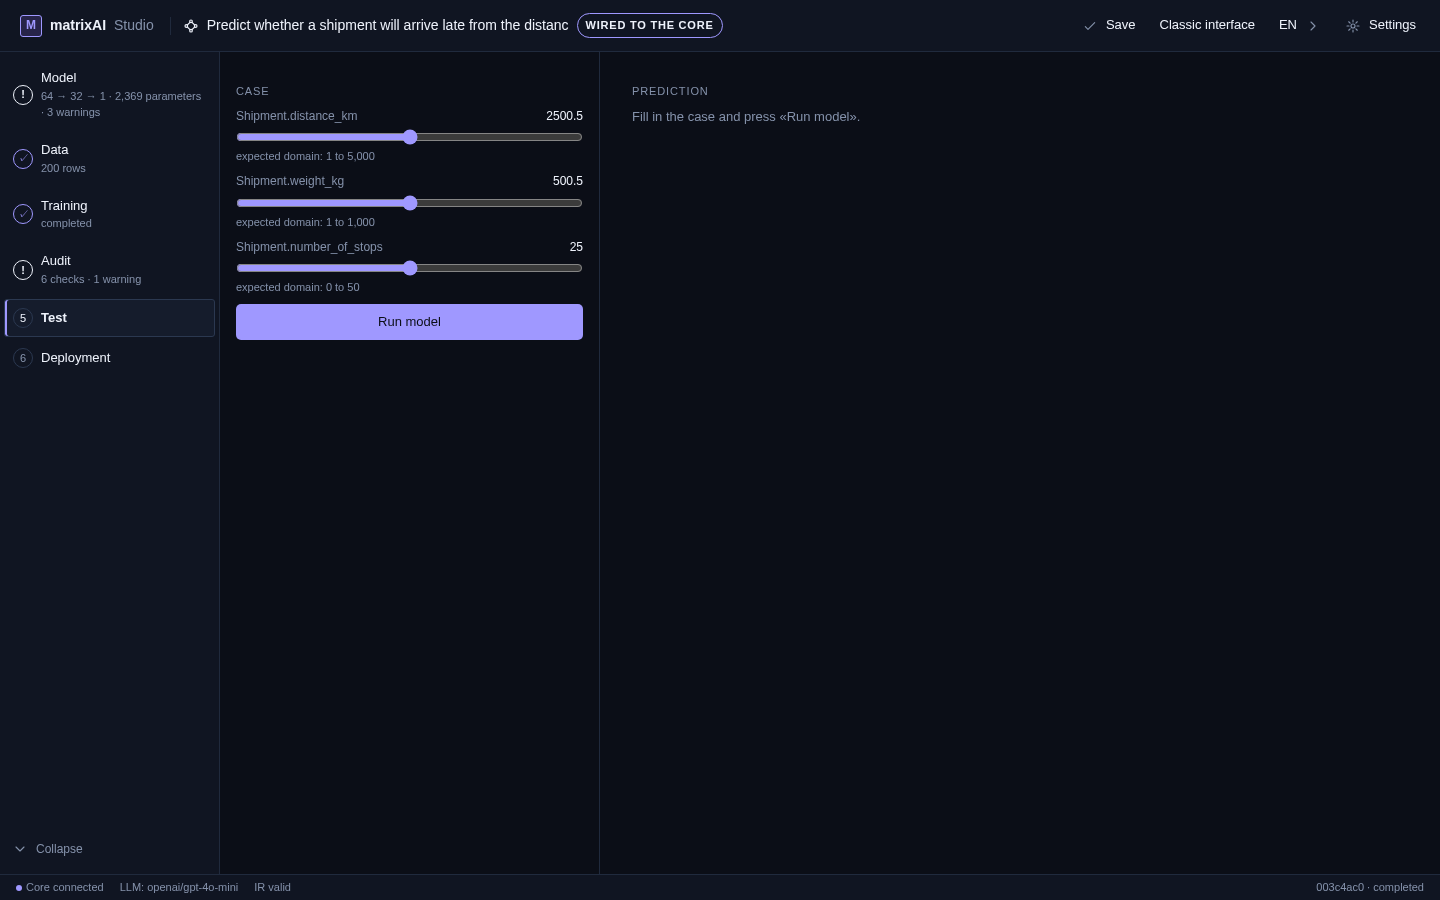
One case, by hand, with its domain on screen
Every input is a slider, and under every slider is the domain the model expects — this one takes a distance from 1 to 5,000, a weight from 1 to 1,000 and 0 to 50 stops. You cannot quietly ask the model about a case it was never built for, because the range it was built for is written where you set the value.
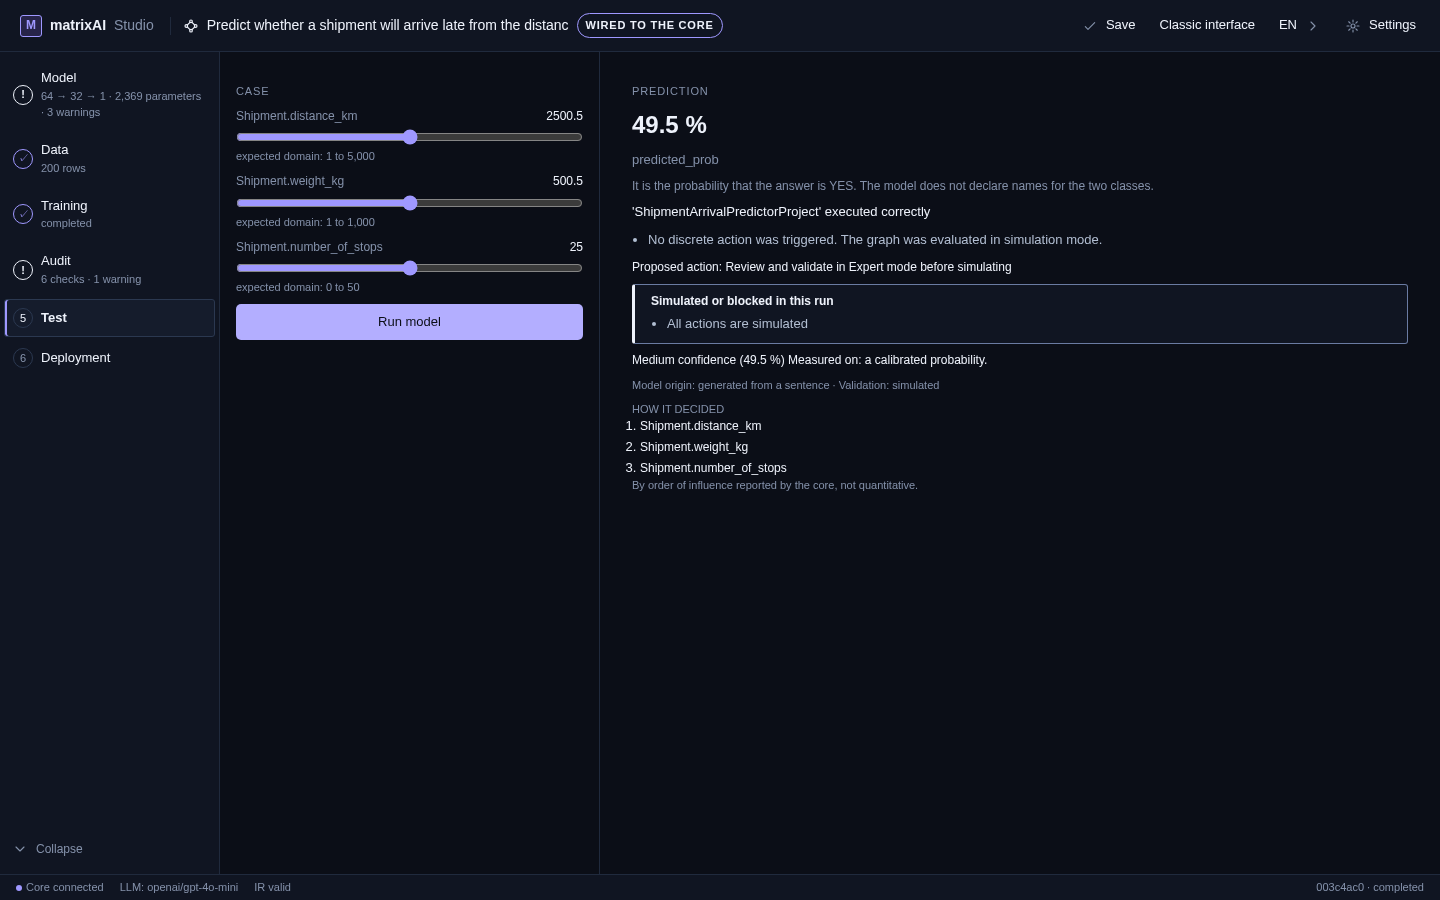
Press Run model and the right-hand column fills — with the answer, and with everything you need to know how much of it to believe:
- The prediction and what kind of thing it is: here a probability, named after the target column, with the caveat that it is the probability that the answer is YES and that the model does not declare names for the two classes. It answers what it can and says what it cannot.
- The execution: that the project ran correctly, that no discrete action was triggered, and that the graph was evaluated in simulation mode — plus a boxed statement of what was simulated or blocked in this run.
- The confidence, with its ground: a level and its number, and the thing it was measured on — a calibrated probability. A confidence without a stated basis is just a number with a percent sign.
- The provenance: whether the model came from your data or from a sentence you typed, and how it was validated. You can always tell which of the two you are looking at.
- How it decided: the inputs ranked by influence — and directly under them, the limit of that ranking: by order of influence reported by the core, not quantitative. It is an order, not a share, and the panel refuses to be read as one.
Package it for where it will actually run
The last phase packages the model, and it starts by admitting it has not done so yet: There is no package yet. Three formats, each described by what it really is rather than by a label:
- ONNX
.onnx— a single model file (large models come out as a.zipwithmodel.onnxand its weights apart). Runs on any platform with an ONNX Runtime. - WASM bundle
.zip— an ONNX Runtime Web bundle, for browsers and Node.js. - Edge bundle
.zip— self-contained: the ONNX model, the manifests and the script that serves it.
The text above the list names the one that stands on its own: the self-contained bundle is the only one that opens and predicts without you writing anything. It carries the model in ONNX, a predict.py that loads it and validates the schema, the manifest with its hashes, and the card with its metrics and its limits. Build the package produces it.