The Workbench
A third interface for MatrixAI Studio, built like a workshop rather than a guided tour: movable panels, one tab per model, a command palette, and every view of the same model one click away. This page walks its regions and its actions, screenshot by screenshot, from a real session.
The Workbench does ship in the MatrixAI Studio package. It is not the default: the Studio opens in the phases interface, and the Workbench is one click away from its settings — or at /workbench. It is not in the public demo, which serves a single interface.
It is still moving: this page describes what is there today, measured from a real session, and nothing here is a promise about what comes next. The download also includes the two older interfaces: the classic one — the reference, and the one every other interface is measured against — and the phases interface, which walks the whole lifecycle one phase at a time.
What you see when you open it
The Workbench opens with the Assistant in front and no document loaded. Six regions share the window:
- The activity bar, the thin strip of icons on the far left: one icon per view.
- The primary sidebar, which shows whichever view is selected — here the Assistant and its three ways in.
- The editor, in the middle, with a tab per open document. On a fresh start the only tab is Welcome.
- The secondary sidebar on the right, the Inspector: it describes whatever you select — a node, a field, a run.
- The bottom panel, with Problems, Jobs, Output and Matrix Console.
- The status bar: the open document on the left, and on the right whether the backend answers, which LLM is configured, and whether it is running on CPU or GPU.
The title bar holds the search box (Ctrl+K), three toggles — primary sidebar, bottom panel, secondary sidebar —, a layout preset selector (Default Data Training Audit), a switch to the light theme, and a link across to the phases interface.
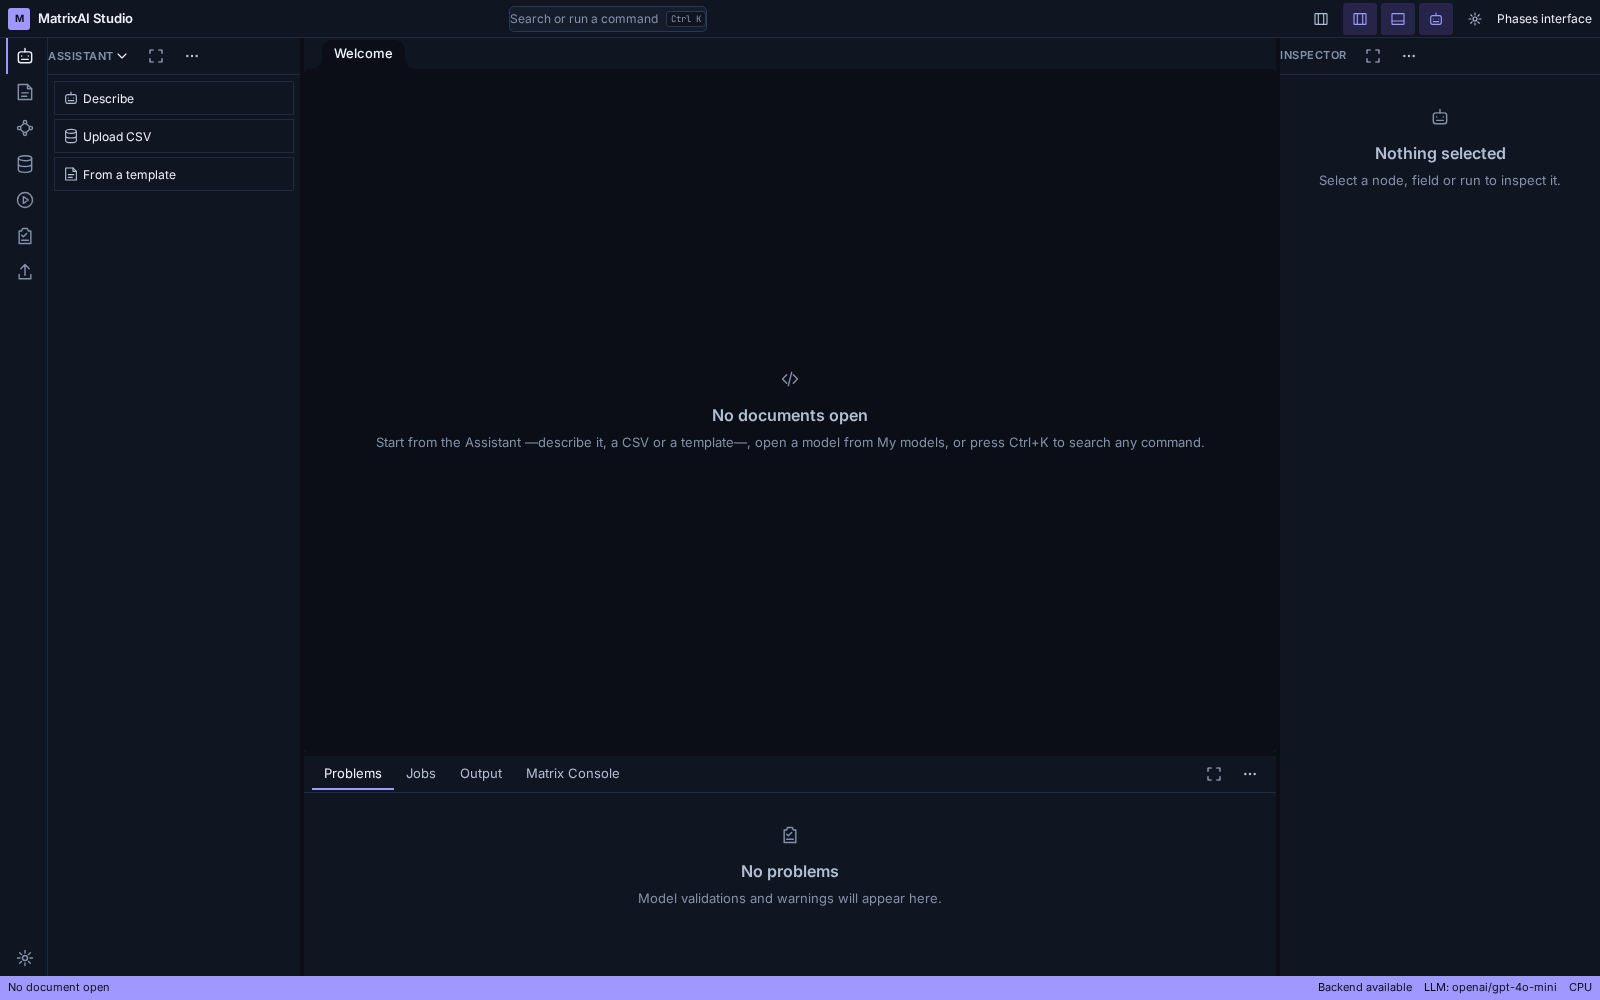
The activity bar carries eight views:
Ctrl+K — one box for everything
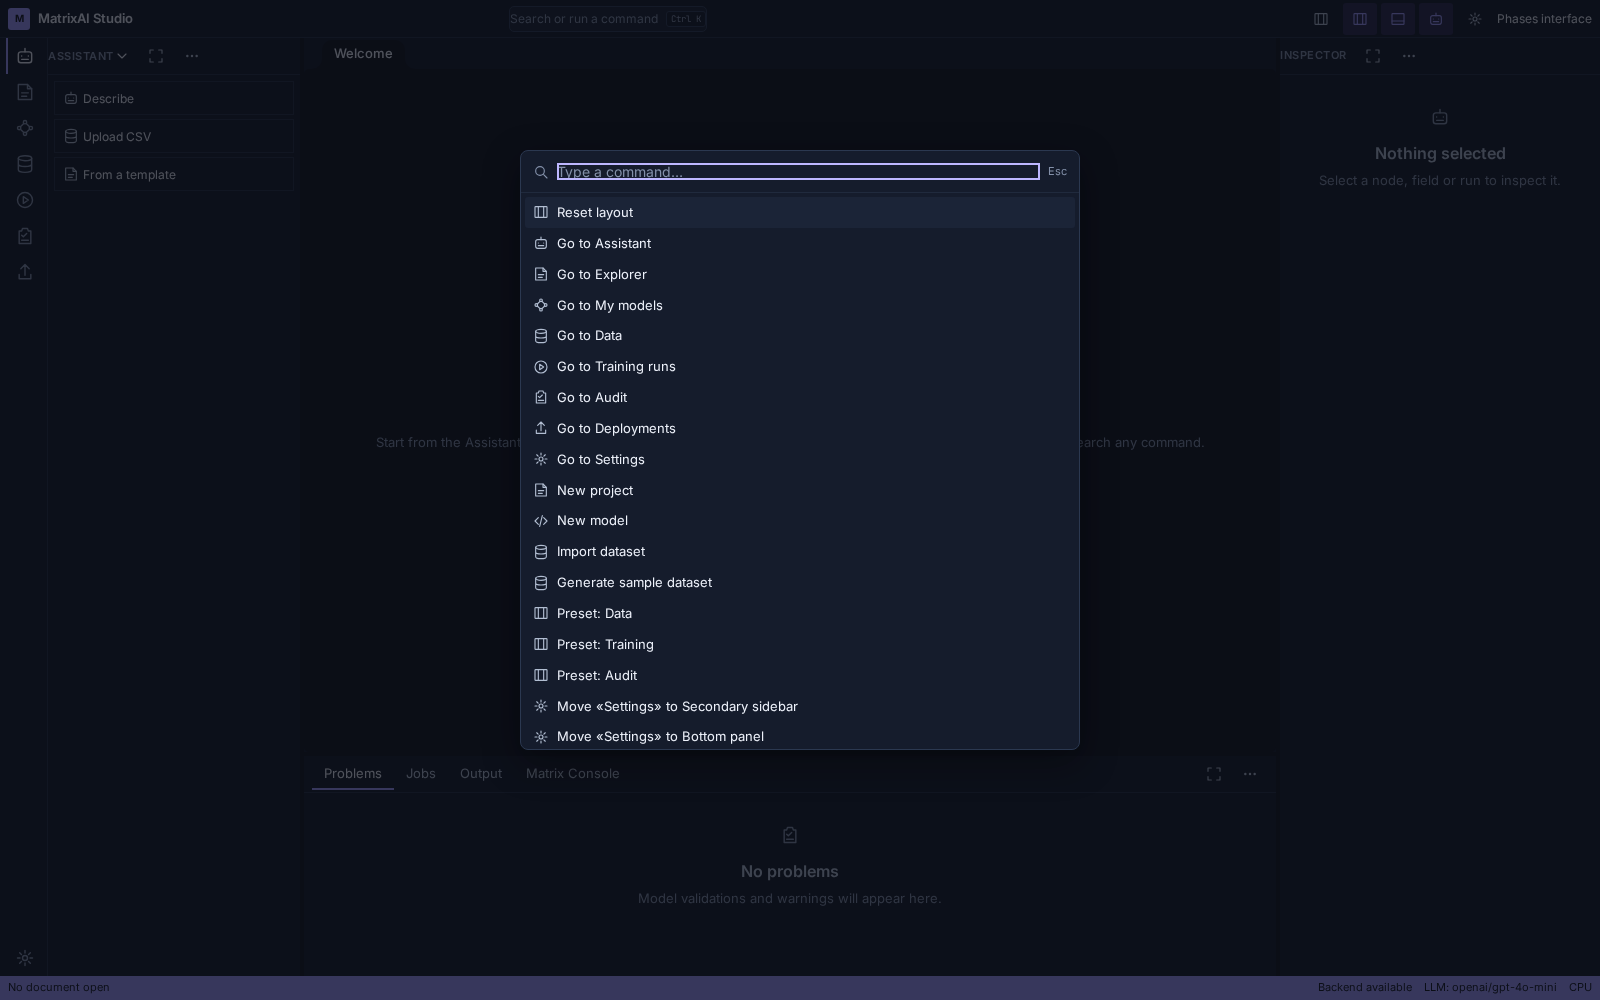
The box in the middle of the title bar is both search and command line. Press Ctrl+K, type, and the list narrows as you write; Esc closes it. Without typing anything it already lists what there is to do:
- Reset layout — back to the default arrangement of panels.
- Go to… one of the eight views, without hunting for its icon.
- New project and New model.
- Import dataset and Generate sample dataset.
- The three layout presets: Preset: Data, Preset: Training, Preset: Audit.
- Moving a view to another region — the secondary sidebar, or the bottom panel.
Three ways in
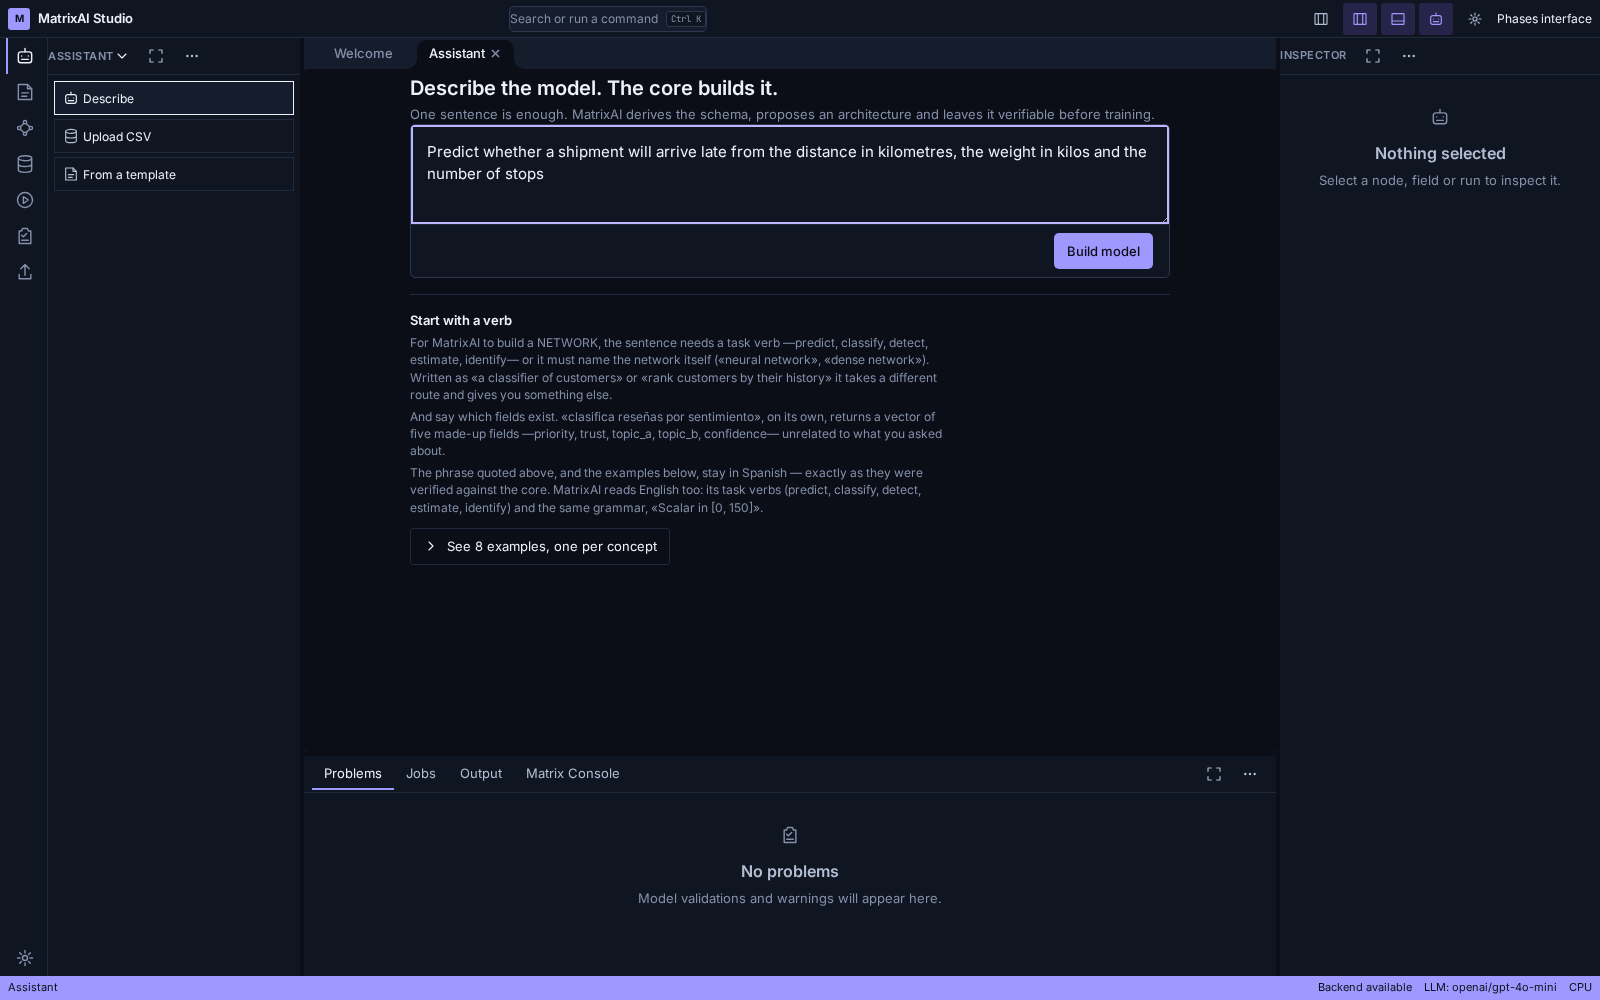
The Assistant offers three doors, and they are the only three ways a model starts: Describe it in one sentence, Upload CSV and let the core read the schema from your own data, or start From a template.
The Describe door opens in the editor as its own tab. One sentence is enough — the core derives the schema, proposes an architecture, and leaves it verifiable before any training happens. If you would rather not write from scratch, the example buttons under the box fill it in for you. Then press Build model.
The document bar — and why an action is off
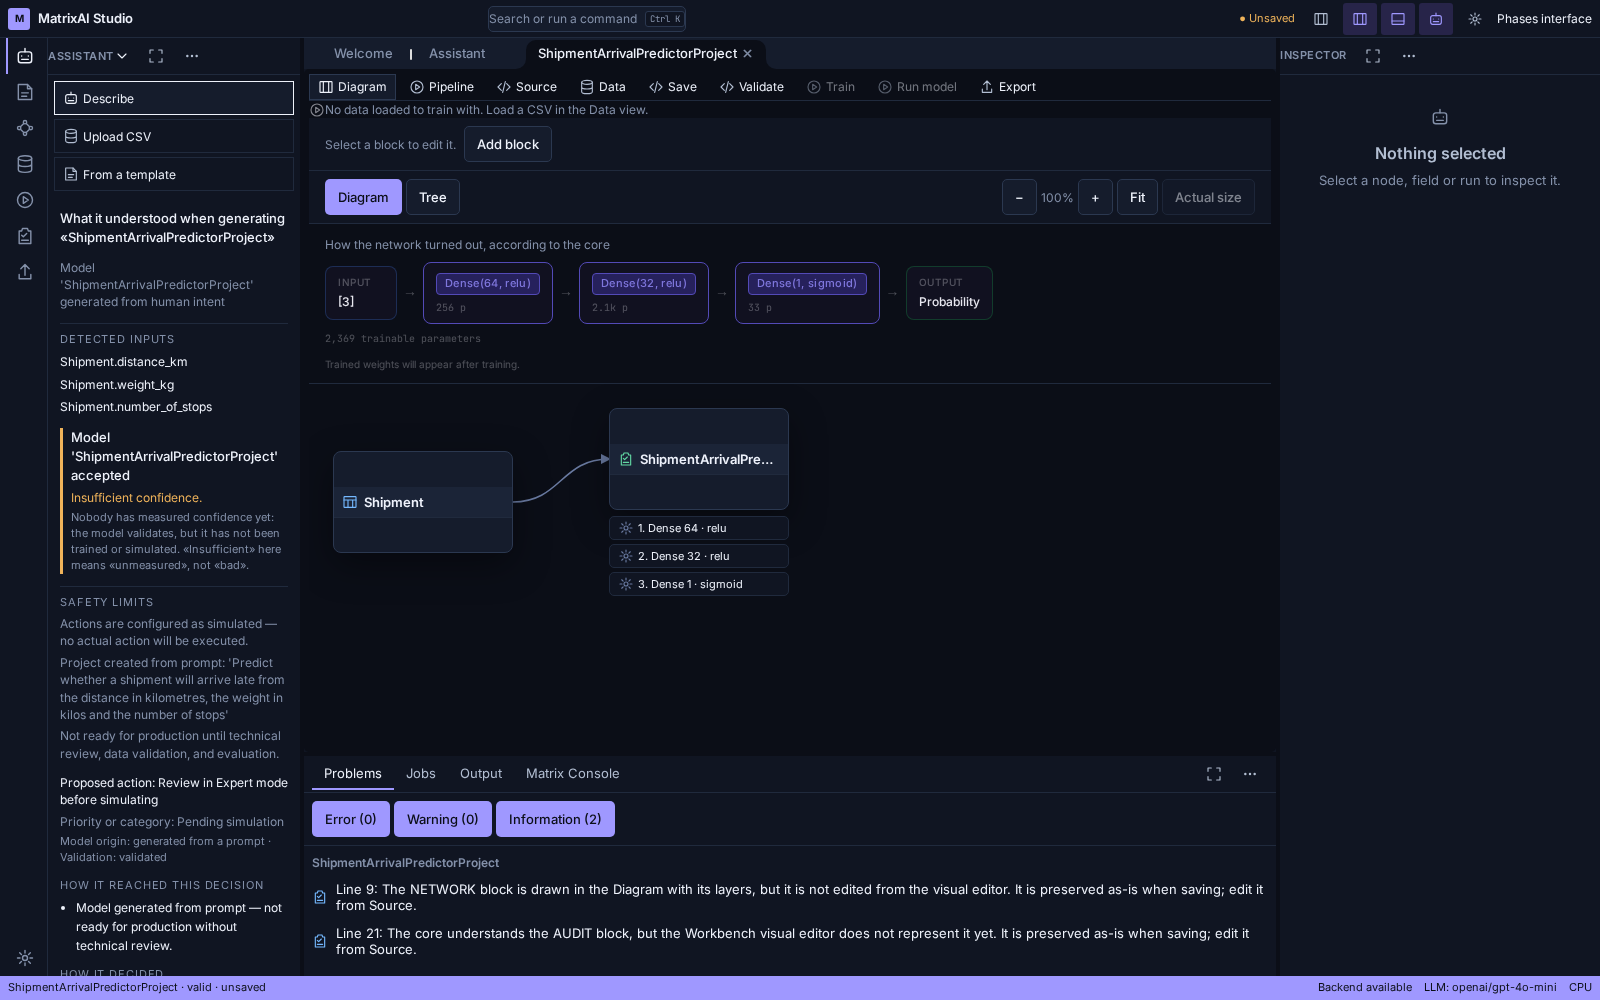
Once a model is built it gets its own tab, and that tab has its own bar. Four of the nine entries switch the view of the same model; the other five do something to it:
An action you cannot take right now is shown switched off, with its reason written on the screen — in a line directly under the bar, not hidden in a tooltip you would have to hover a grey button to find. In the screenshot below the model has just been built and has no data yet, so Train is off and the line reads:
Run model behaves the same way on a model that has never been trained:
Each reason names what is missing and where to fix it. That is the rule the whole interface follows: nothing is disabled in silence.
Pipeline — how the core built it, stage by stage
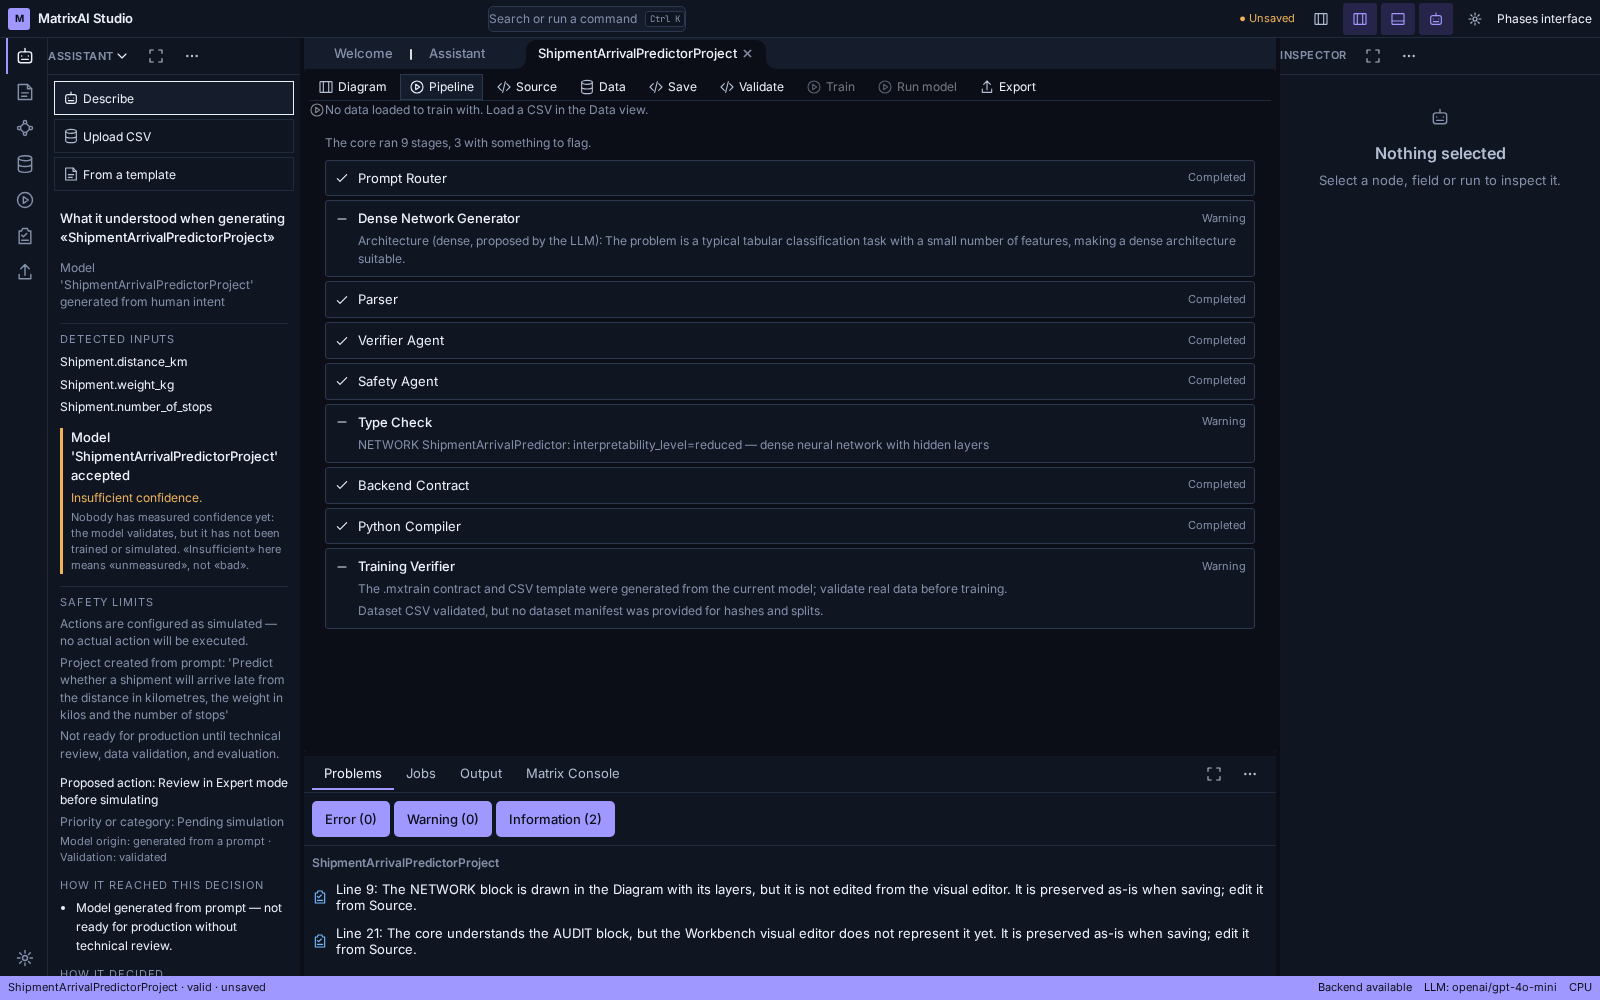
The Pipeline view lists the stages the core ran, each with its own result. It opens by saying how many there were and how many have something to flag — The core ran 9 stages, 3 with something to flag. — and a stage that flagged something prints what it has to say, right there.
In the session below: Prompt Router, Parser, Verifier Agent, Safety Agent, Backend Contract and Python Compiler completed clean. Dense Network Generator explains why a dense architecture was chosen. Type Check reports the network's interpretability level. Training Verifier warns that the training contract and the CSV template were generated from the current model — real data still has to be validated before training — and that no dataset manifest was supplied for hashes and splits.
Source — the .mxai behind the diagram
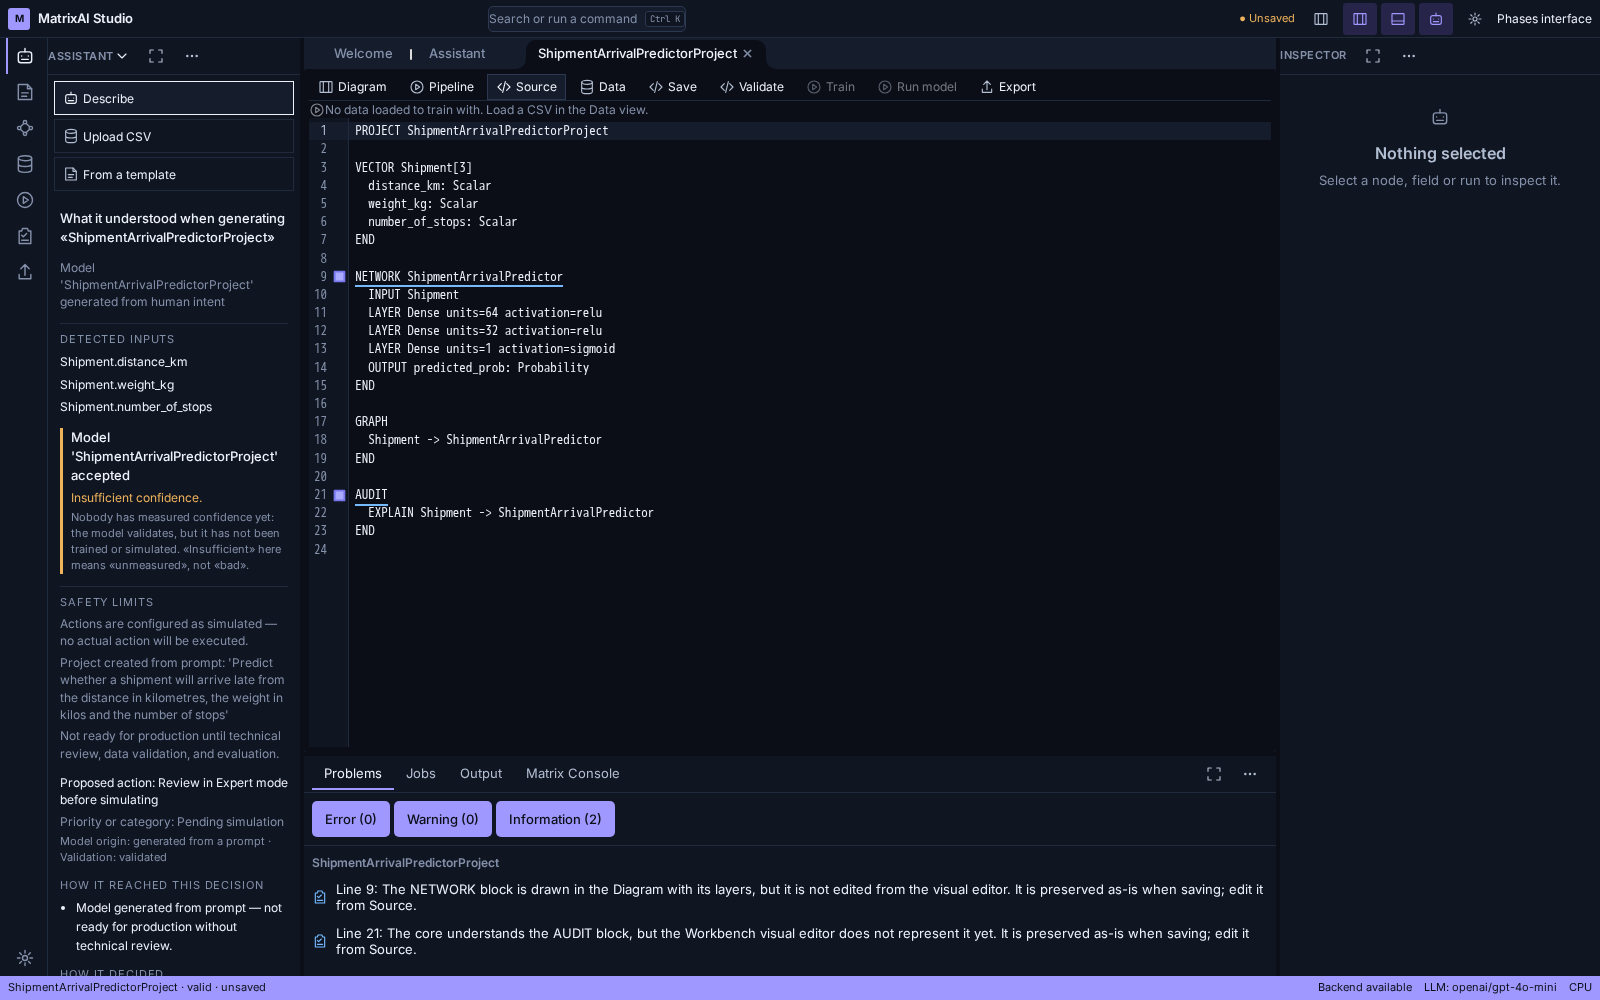
The diagram is a drawing of a text file, and Source is that file. The model is written out in full: the project, the input vector with one line per field and its type, the network with its input, its layers and its output, the graph that wires the blocks together, and the audit block.
The text is editable, and it is where you work on the blocks the visual editor does not represent yet — Problems tells you exactly which ones (see below), and they are preserved as they are when the model is saved.
Data — load a CSV, or generate one
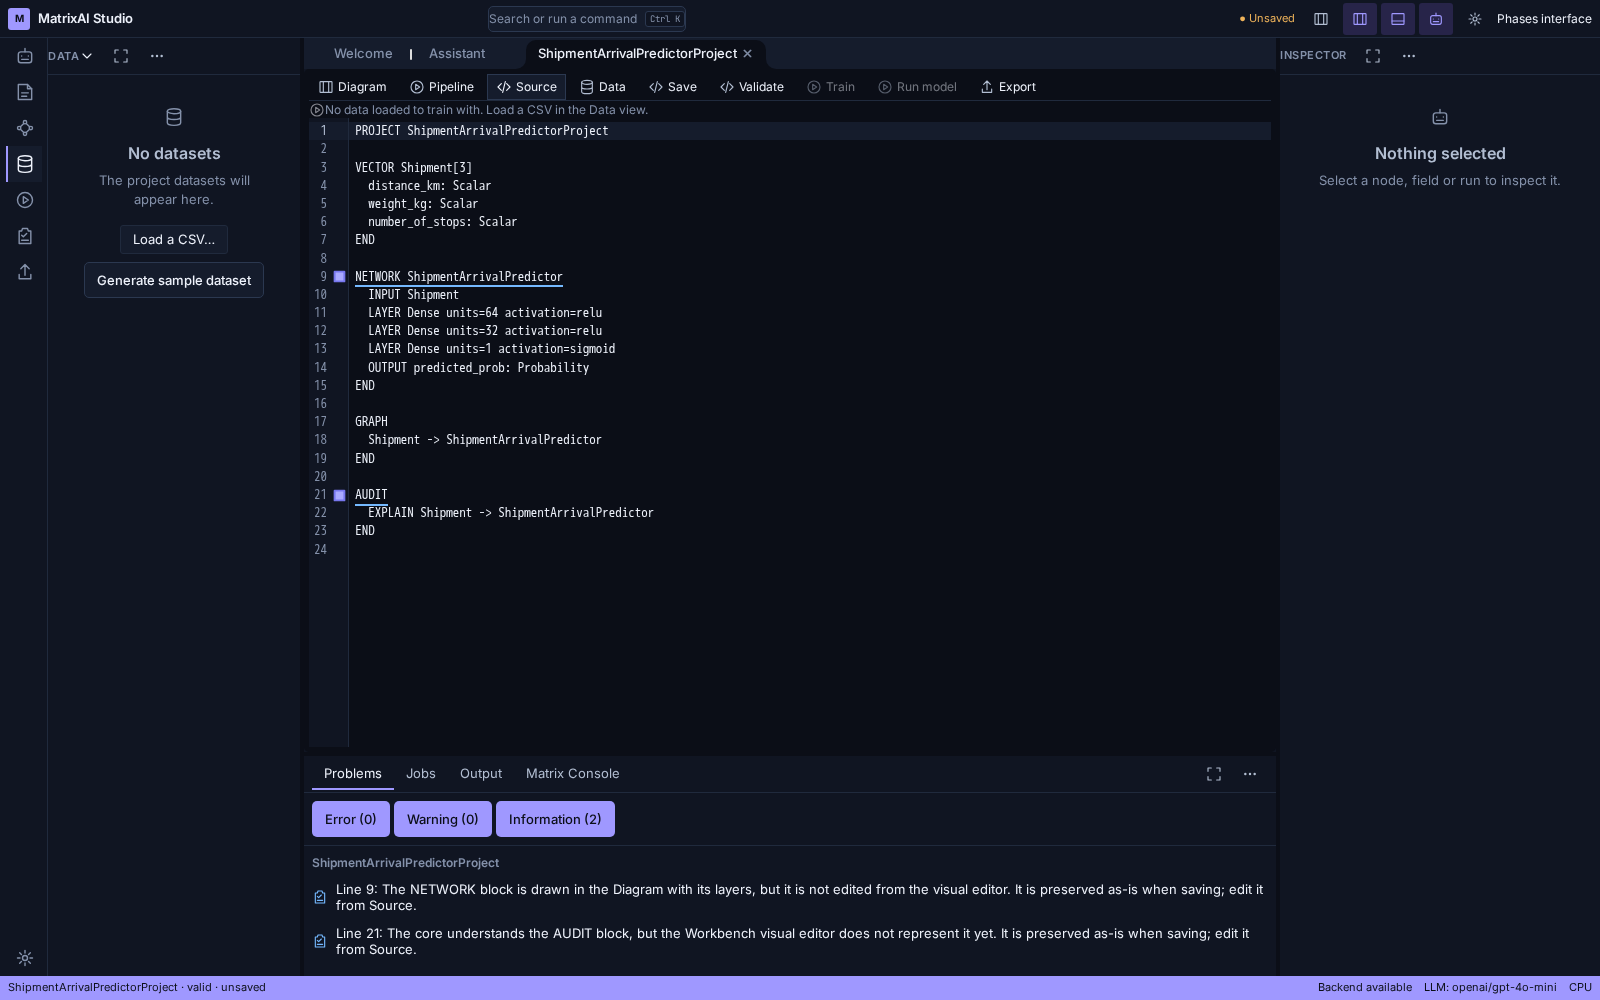
The Data view is where the model gets something to train with, and it is the place the disabled Train button points you at. With an empty project it says so plainly — No datasets — and offers the two ways forward: Load a CSV… with your own file, or Generate sample dataset to get a synthetic one that matches the field types and ranges of this model.
Problems — what the checks found
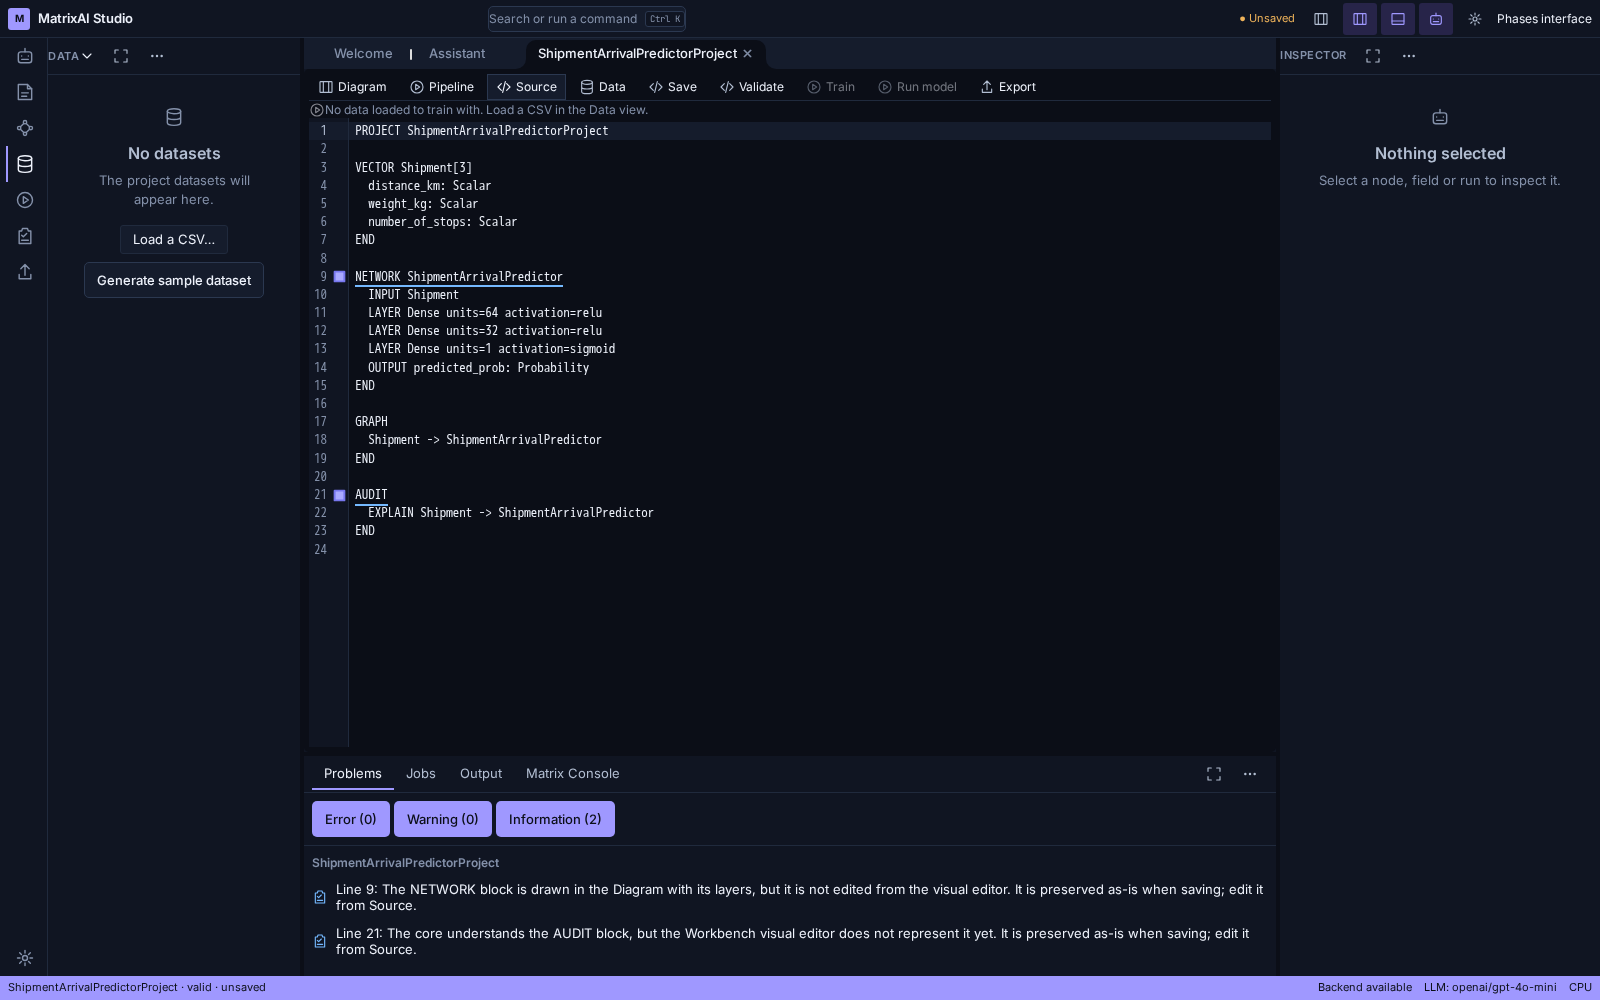
Problems groups what validation found, per document, behind three counters you can filter by: Error, Warning and Information. Each entry names the line it refers to, so you can go and look at it in Source.
The model in this session has zero errors and zero warnings, and two informational entries — both of them saying the same kind of thing honestly: the NETWORK block is drawn in the Diagram with its layers but is not edited from the visual editor, and the AUDIT block is understood by the core but not represented in the visual editor yet. Both are preserved as-is when saving, and both are edited from Source.
Jobs — the work that takes time
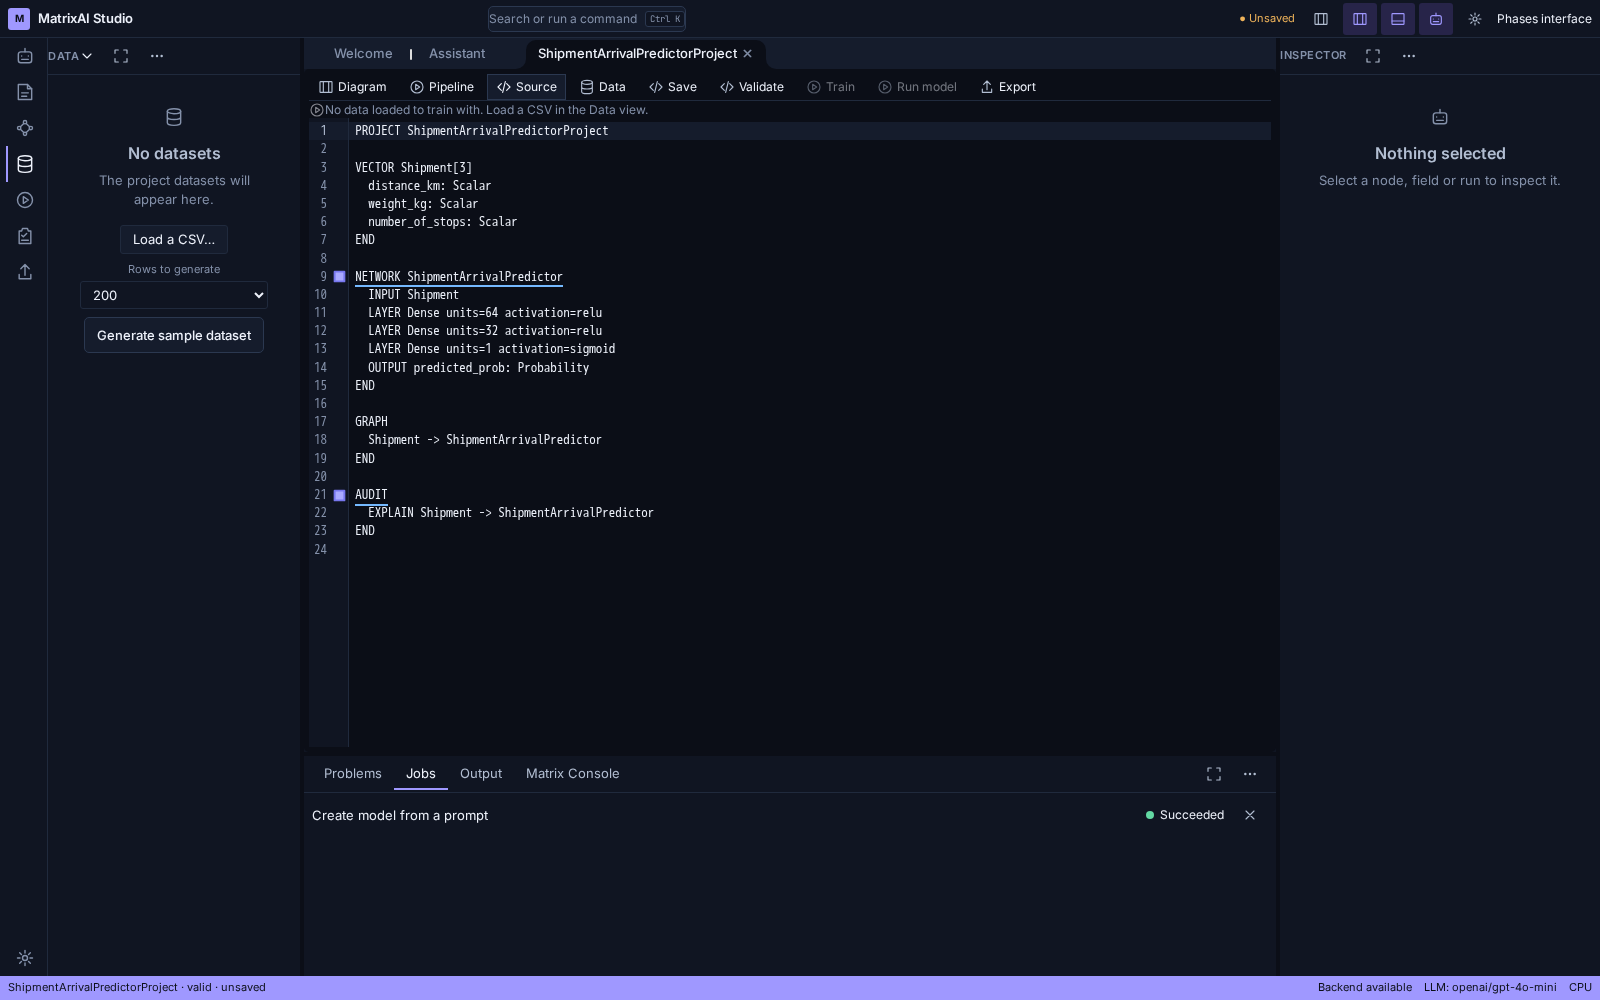
Anything the core does in the background gets a row in Jobs with its state, so a long build or a training run is not an interface that has gone quiet. Below, the job that produced this model, finished and reported as Succeeded; the × on the right dismisses a row you are done with.
Output — the log, by channel
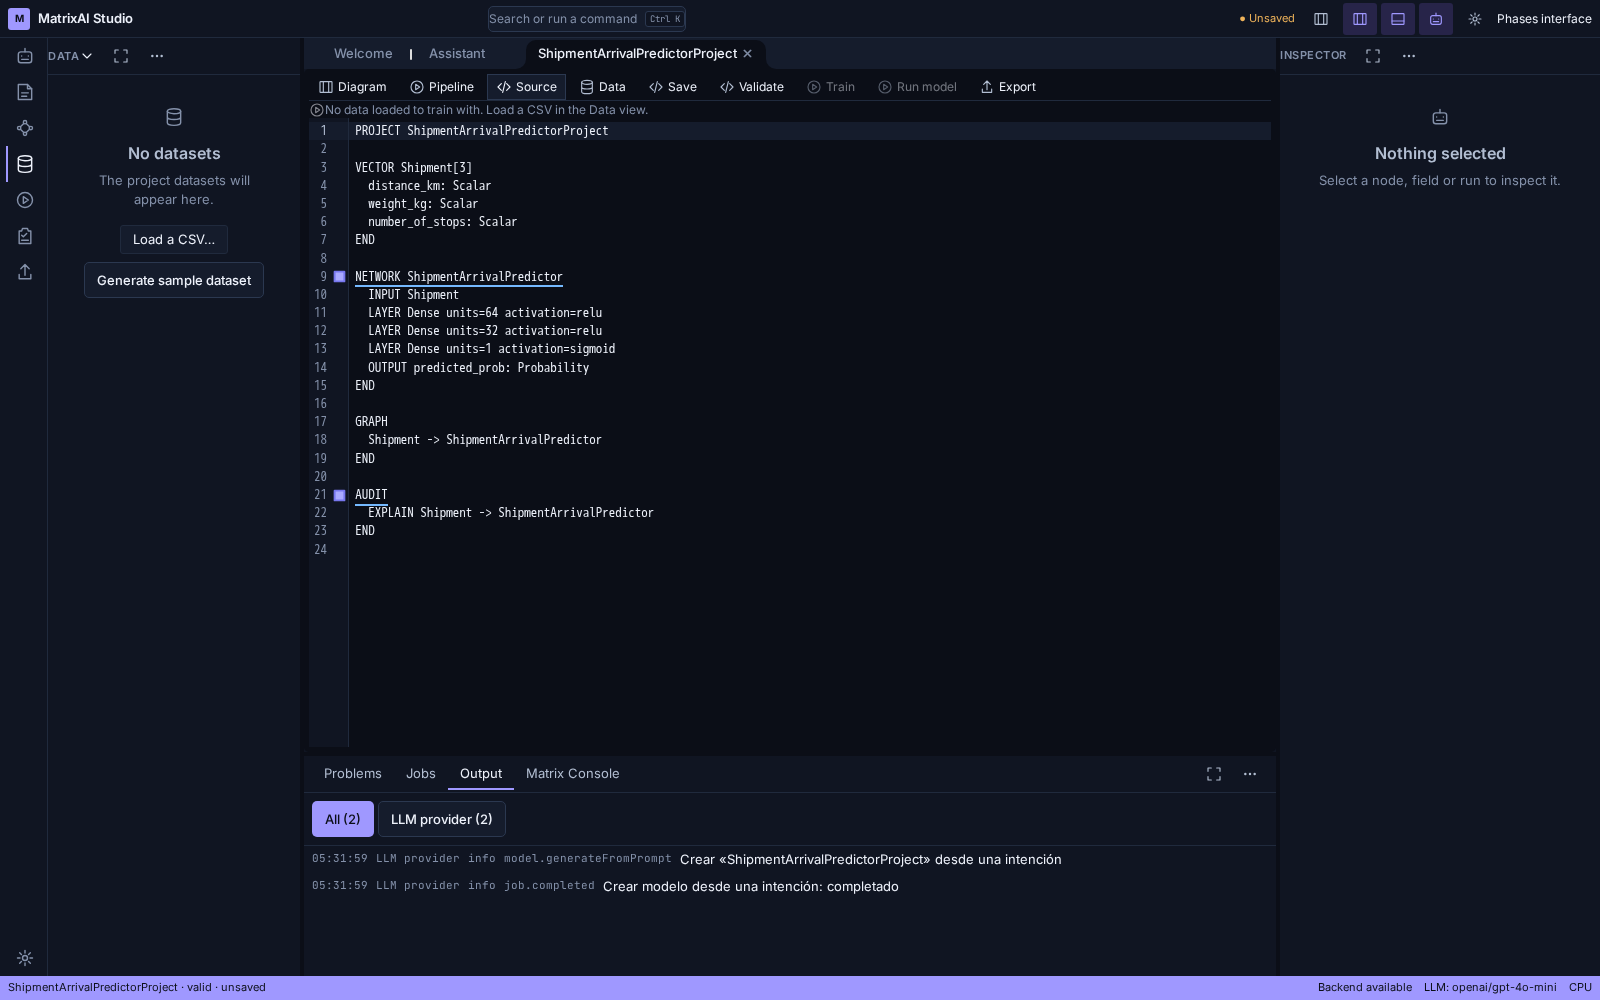
Output is the running log, filterable by channel — All or, here, the LLM provider channel, each with its own count. Every line carries its timestamp, its channel, its level and the name of the event it reports, so a message can be traced back to what produced it.
Matrix Console — typing at the core
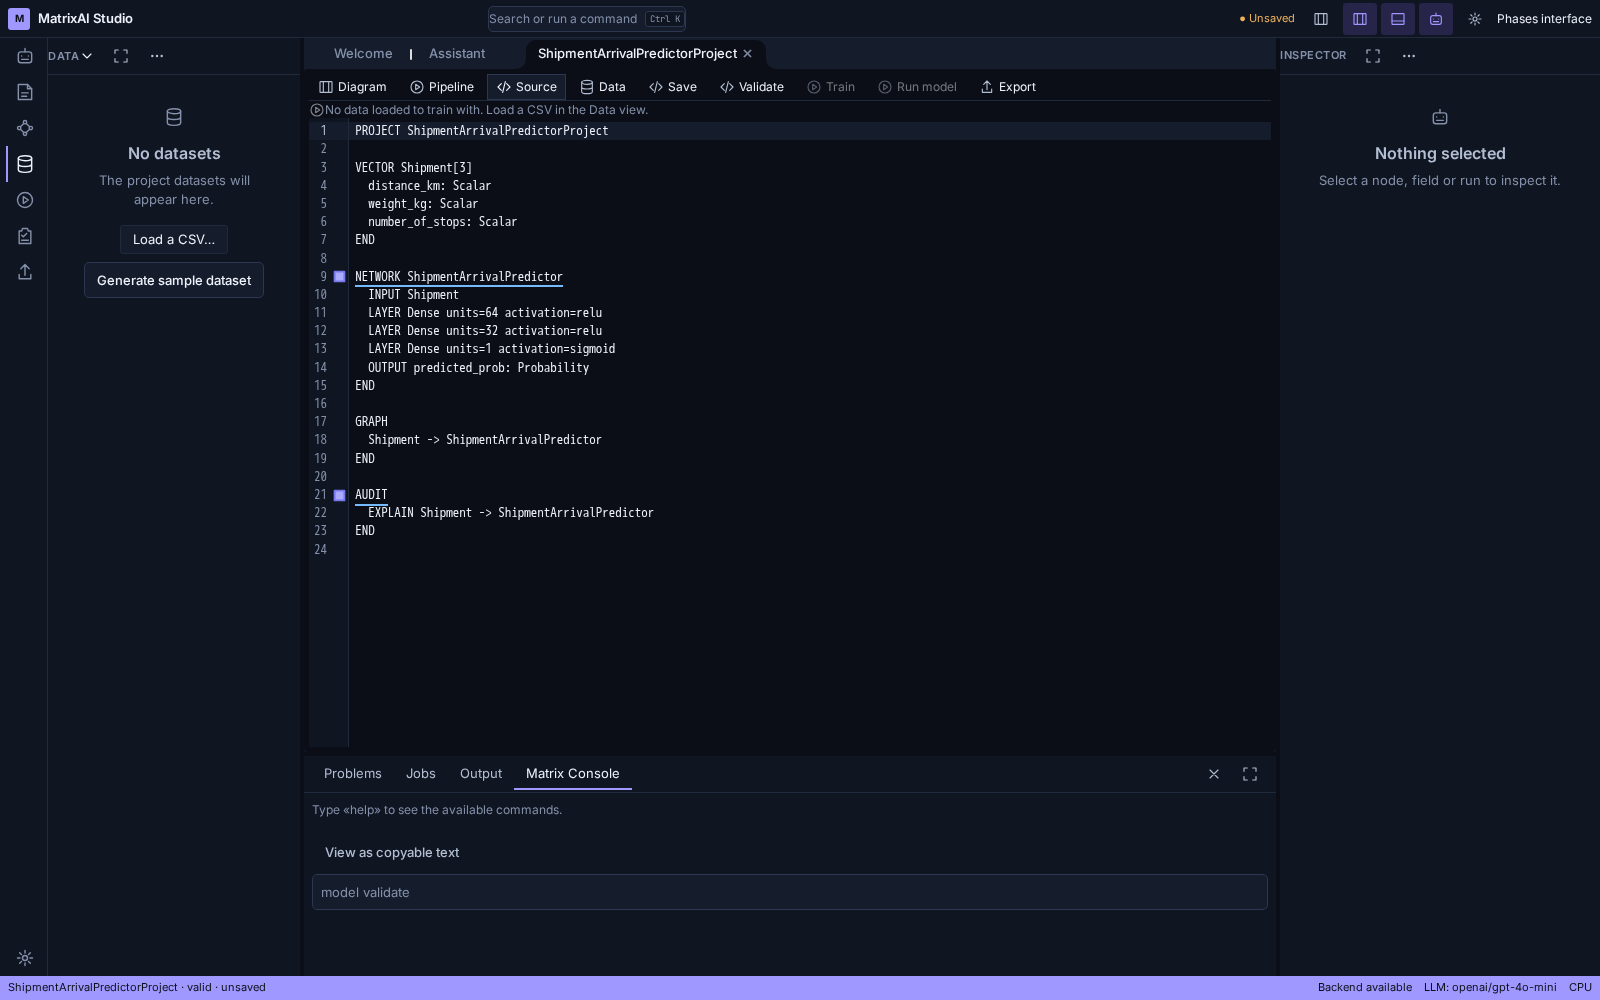
The console takes commands directly. It tells you where to start — type help to list what it accepts — and the input suggests a real one, such as model validate. Its output can be turned into plain text with View as copyable text, which is what you want when you are pasting a result into a report or a bug.
The Workbench is being built as a workshop: it assumes you know what you want to do and puts every view of the model one click away, rather than walking you down a numbered path. That is a deliberate difference from the phases interface, which does walk the lifecycle step by step — and it is why the two exist at the same time instead of one replacing the other.
It is not finished — it keeps moving. Where it stands is at the top of this page: it ships in the download, and it is not in the public demo. Everything here was captured from a real session, so what you see is what exists right now — no mockups, and no screens that only work in a demo.