From download to your first study
This guide takes you from a fresh download to a study you can read and use: the engines compete on your data, you see which one wins and why, and you take the model with you. All on your own machine, with Docker. Your data does not leave it, except what you choose to send to your own LLM.
Download the package — standard (CPU) or GPU
In the members area, press Download package and choose the one you need. You receive a ZIP that carries the Studio’s Docker image inside, so nothing is pulled from any container registry.
Standard (CPU): the package for most uses. It races gradient-boosted trees (LightGBM and scikit-learn) against a baseline, and since v2.8 our new neural network competes too: on its first start the package downloads PyTorch for CPU (about 200 MB) onto your computer. GPU (a test package): the same Studio with PyTorch CUDA; the new network competes there too, and so does our previous network as an experimental engine (in the study they train on the CPU, as measured), and expert mode can train on an NVIDIA GPU. It needs an NVIDIA driver of 550 or later on Linux (560 or later on Windows with WSL2). On Linux you also need the NVIDIA Container Toolkit; on Windows, Docker Desktop 4.25 or later with GPU support enabled.
Each package is tied to your licence, for up to 3 machines. Do not share it.
Extract the ZIP
Extract it anywhere you like. You get a folder with this structure:
matrixai-studio/
├── image/
│   └── matrixai-studio-v2.12.tar   ← Docker image (~183 MB)
├── studio/                        ← the web interface
├── nginx/                         ← reverse proxy config
├── docs/en · docs/es              ← the documentation, in both languages
├── docker-compose.yml
├── .env                           ← already written, with your licence key
├── Dockerfile.cpu / Dockerfile.gpu · .dockerignore ← build the local PyTorch image (CPU package: Dockerfile.cpu; GPU package: Dockerfile.gpu)
├── MANIFEST.json                  ← checksums of every file in the package
├── start.bat / start.sh / start.ps1   ← the file you run
├── stop.bat / stop.sh
├── LICENSE · TERCEROS.md · LICENSE-AGPL-3.0.txt · LICENSE-APACHE-2.0.txt
└── README.md
The ZIP already carries a .env with your licence key written in it, in both packages: there is nothing to copy or fill in. Keep it private.
Start it
Windows: double-click start.bat, or from PowerShell:
.\start.batMac / Linux: in a terminal:
chmod +x start.sh && ./start.shThe script runs four steps on its own (the second builds the local image with PyTorch, only the first time):
When it finishes it prints the address of the Studio. The first start loads the image, which takes a little; the next ones are faster, and if there is no connection the script uses the activation it saved. On the first start both packages also build a local image with PyTorch: PyTorch for CPU (about 200 MB) in the standard package, PyTorch CUDA 12.4 in the GPU one. It needs internet and takes a few minutes; later starts skip that step and download nothing.
Open the Studio
Open your browser at:
http://localhost:8080The port is published on your own machine only (127.0.0.1), not on your network. You land on the Studio’s home screen: press Try the study. The status bar at the bottom says whether the core is connected and whether an LLM provider is configured; for a study you need none.
Your first study
Fill in the framing with a form example (it shows what goes in each field; its rows are only a sample) or, to measure for real, with one of the measured examples — real public datasets — or with your own CSV.
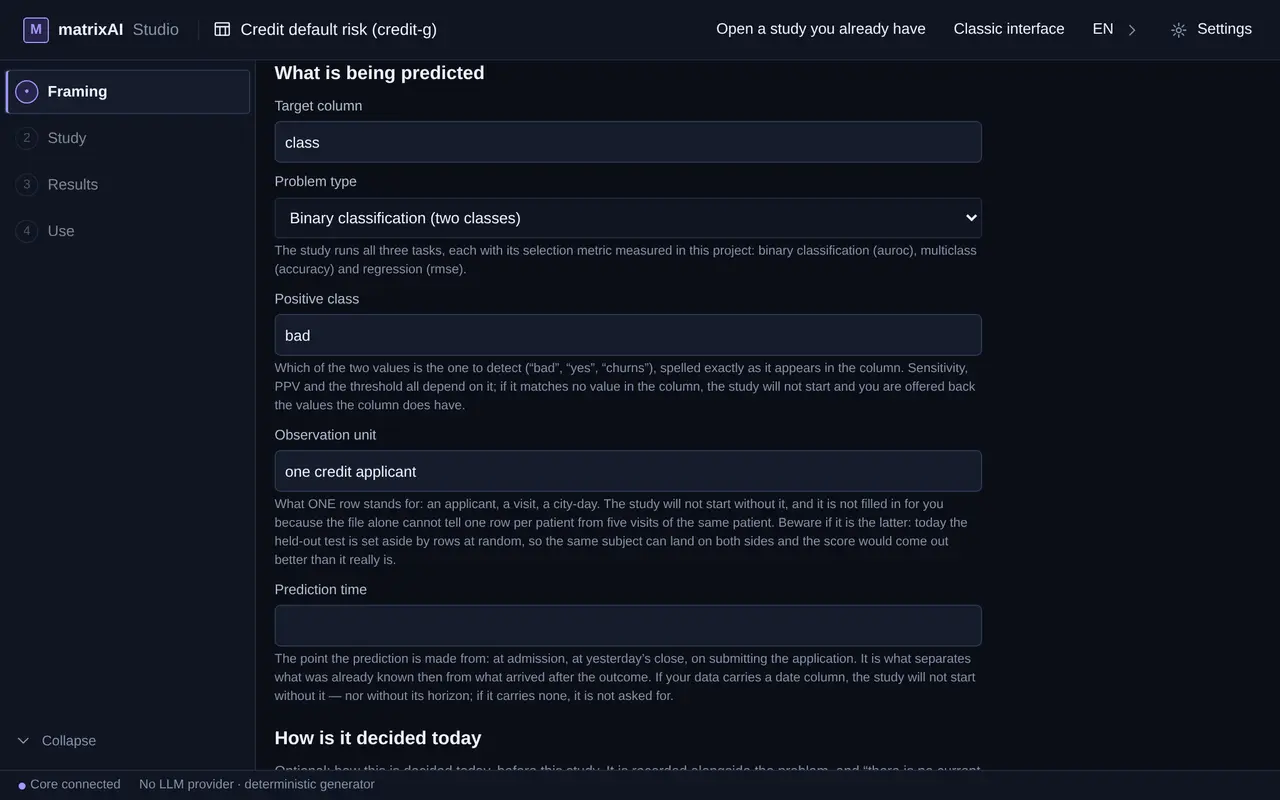
Then choose what to predict: the target column, the kind of problem, the positive class, what one row stands for and, if your data carry a date, the moment of prediction. The study does not start without the unit of observation: the Studio does not guess what it cannot know.
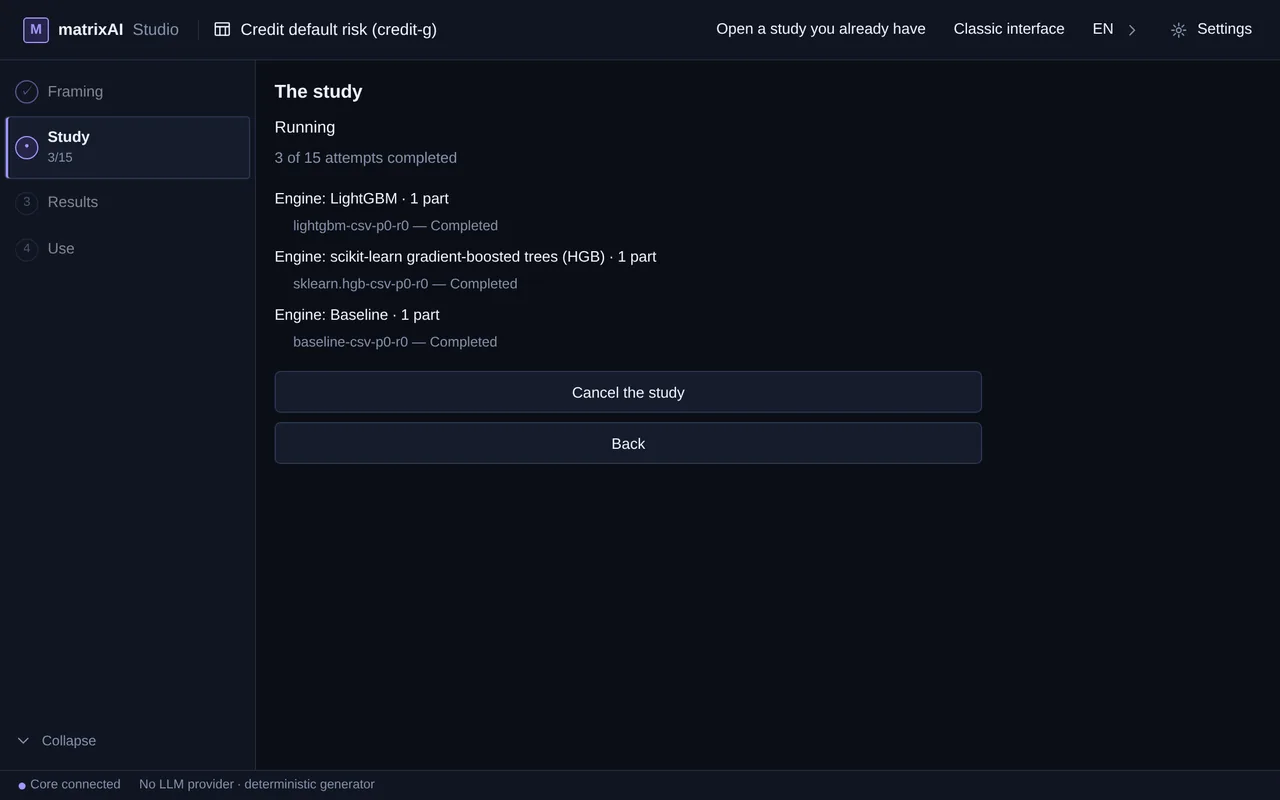
Press Confirm objective, then Start the study. The screen counts the attempts as they finish — each engine is tried on several parts of your development data, and the test set stays untouched until the end — and you can cancel.
Read the Results
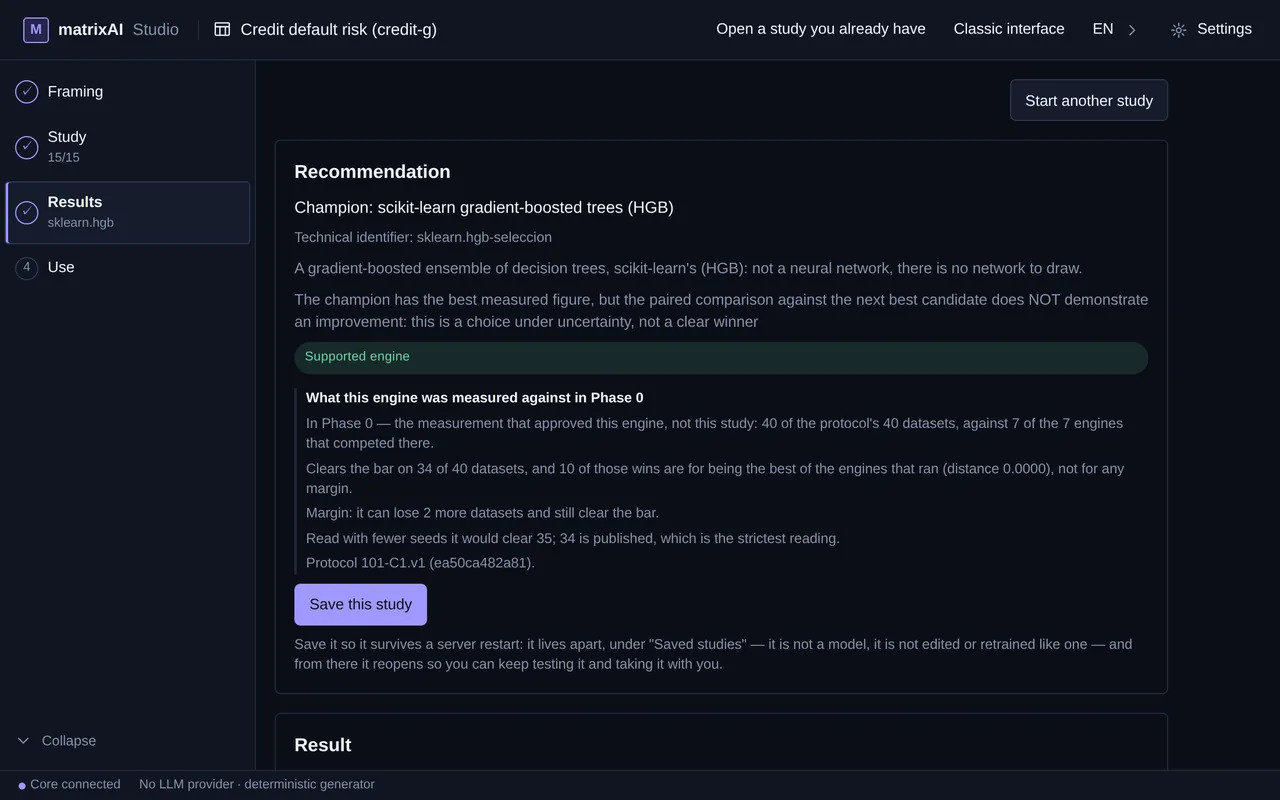
Results opens with the recommendation: the champion by its engine name, what it is and why. If the paired comparison with the runner-up does not show an improvement, the screen says it is a choice under uncertainty, not a clear winner.
Below, its figure on the held-out test — data no candidate saw while competing — the comparison of all the engines (the mean over the parts is the one that decides), the evidence and the receipt. The receipt comes out Unsigned until you configure your own signing key: put MATRIXAI_RECEIPT_SIGNING_KEY (the key, in hex — for example the output of openssl rand -hex 32) and MATRIXAI_RECEIPT_SIGNING_KEY_ID (a name for it) in the .env, and stop and start the Studio again.
Use it and save it
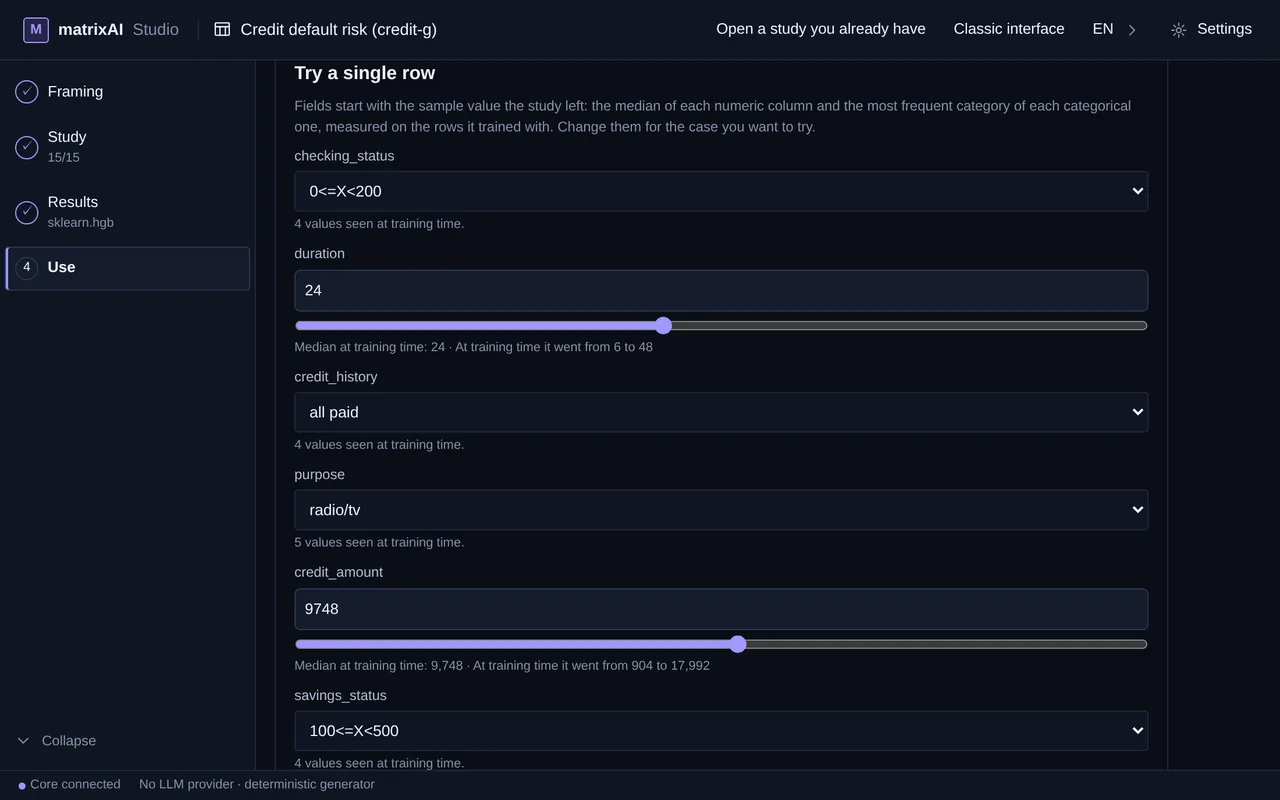
In Use, try a row with your own values (it starts from the sample the study left) or choose a CSV and predict it whole, then download the result.
Save this study keeps it under “Saved studies”, and it survives a restart. To take it with you: Build the package gives you the model, its preparation and a predict.py that runs with Python outside the Studio (it needs the Studio’s engines, which are not on PyPI); Build the full study gives you estudio-completo.zip, which you reopen in another Studio with “Open a study you already have”. A page that predicts in the browser is offered only when LightGBM wins a binary problem; otherwise the option is off, with its reason.
docker run --rm --gpus all nvidia/cuda:12.4.0-base-ubuntu22.04 nvidia-smi; if it does not show it, training still works, but on the CPU.